Showing posts with label Halloween. Show all posts

Sunday, November 1, 2015

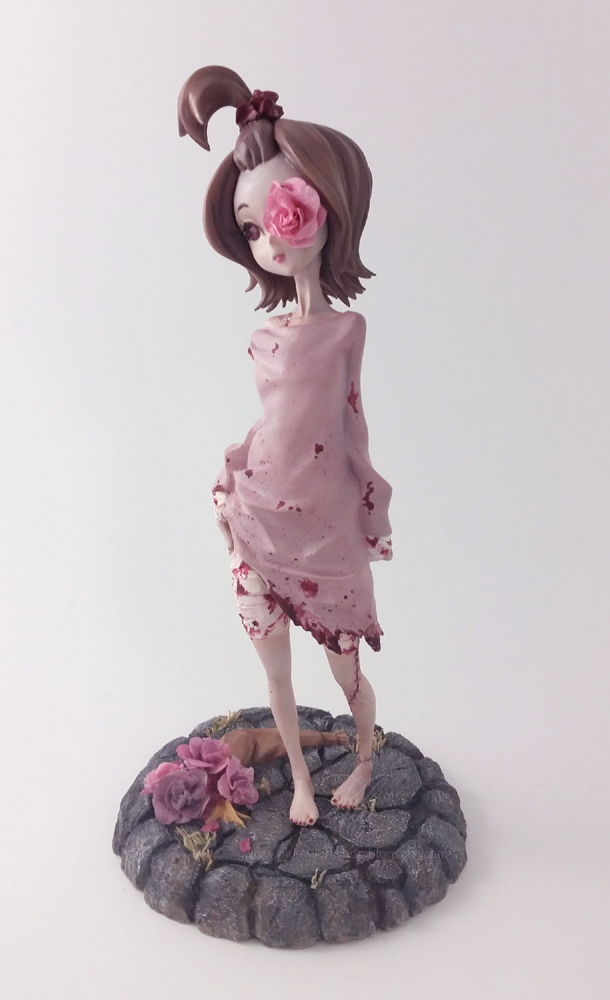
Nonscale Little Bride - Original Character

Good morning/afternoon/evening everyone!

Although it is no longer Halloween I hope everyone had a safe and spooky time. I didn't end up doing that much since I wanted to see if we received any trick-or-treaters but it was an abysmal failure since only 3 showed up. I also left the candy bowl outside in case anyone stopped by and some kid stole the entire candy bowl so that was disappointing lol...anyway I managed to finish this kit last night but there were quite a few people who finished kits on Halloween so I decided to hold off on posting. Photo editing also took me a while >_<

Oh also I would like to announce that I finally created a Facebook page for my work. When I'm working on kits I will be posting more WIP photos on there since it's easier so if you enjoy looking at my work I would really appreciate a like on the page. Thank you so much. Here is the link to my Facebook.

Sunday, September 6, 2015

Busy Bee Life and New Kits

Hello everyone, long time no post! I've been very inactive on this blog lately due to a combination of life and venturing out into the real world ^^ I don't want to bore anyone with the details but in short the past few months I've been enjoying gainful employment, moved into a house, and have been doing a bit of travelling (PAX Prime anyone?) so I haven't had much time to sit down and focus on my kits.

This is partially my fault since I now have no work space...the desk I've been using to build stuff on is actually my computer desk but now that we have a dedicated computer room I don't want to haul all my paints and stuff across the house and get everything covered in resin. >_> Hopefully in the next few weeks I'll be able to acquire a desk so I can sit down and focus on kits. This hasn't stopped me from purchasing a number of items though - I still enjoy hoarding and collecting resin when I feel like spoiling myself :p If it isn't clothing or cosmetics (another more recent obsession) it's garage kits hehe.

With that said I just wanted to show off a couple of recent purchases I've made since I've been wanting to gush about them for a while but I don't want to bother anyone. Silly me didn't realize that I could rant on my own blog!

Habenero-tan set by Midass


This was a complete impulse purchase I made on Mandarake back in May. I have no idea why I decide to buy this kit because I'm not familiar with Habenero-tan besides the fact that she's a mascot and likes to sit on a toilet (because it has to do with spicy food I guess???) but I couldn't pass it up for 2,000 yen. The coolest part is that this kit came with an original 4koma and post card. I'm pretty sure the post card is signed by the creator of Habenero-tan but it might also be printed on...either way the quality of the paper is really high quality and it's a pretty cool freebie. I did a ton of hunting on Midass but it appears this is either the only kit or one of very few kits they created so maybe they were just an unfortunate company that flopped. The kit is super straight forward and they're both very small so when/if I build this set I'll be sure to take a bunch of photos of all the bonus goodies.


Hagoromo-chan by Kilohana
AHHHHHHHHHHHH!!! This kit is an absolutely dream of mine to own and I legitimately freaked out when I found this one for sale. A fellow GK acquaintance CinnamonSwirls recently decided to cut down on her kits and put this original one up for sale and I was lucky enough to see it and snatch her up. I have a very soft spot for small fantasy kits involving skinny/ethereal fairies and this figure is everything that I love all wrapped up into one convenient resin package. The level of detail is perfect for someone like me. To give you an example the flower on the top of her head has these little anthers (see pic to the right)...every single one of those anthers needs to be glued on separately and painted onto the flower petal base. You also can't really tell in the picture but she comes with a bunch of clear parts too! The snail, cherries, wings, little shoes, hair and a couple of other pieces are made of clear resin which adds a very interesting contrast to the rest of the kit. I've never painted clear parts before so I'll most likely have to bring out my airbrush for those. I could rant about this kit a lot because I'm so excited it's in my possession but again that will have to wait until I'm actually building it lol.

Little Bride by Munchkin

Forewarning: This kit is a recast. If you're not OK with that please just skip this little section since I'm not about to discuss the ethics of selling recasts on my blog atm. I really wanted this kit immediately since Halloween is coming up and I want an excuse to paint something a little spookier (not that this is spooky...at all...). After my Mage kit I want to do something darker and a little bloodier and I've been eyeing her since I've seen so many beautiful versions of this kit. She's so versatile too! You can paint her to look more like a normal little girl or go completely Monster High and use all sorts of colors like greens and purples ^^ Every single build I've seen of her looks completely different and unique which isn't something you see too often. She doesn't have very many parts and is pretty small (~15cm fully built) so I'm hoping for a quick and relatively painless build. I have no idea what kind of color scheme to give her though...this will be my next kit though so expect to see a lot more of her soon.


That's all I have for now so thanks for reading ^^ I hope to post a lot more soon.

Wednesday, January 14, 2015

GK Ques Q Chibi Remilia Update (Pt. 2)

Hello my fellow GK builders! It's been a little while since I've posted and I have some pretty exciting news so I figured its about time for another update.

I started using my airbrush!!! Yup, THAT'S the exciting news lol. It's the start of a new year and I was tired of letting all my supplies gather in the corner so I decided it's a good time to reach my goal of finishing TWO garage kits (wow big dreams guys) by learning how to use my supplies. I don't have too many pictures but there is one thing I realized...it is really quite difficult to get work-in-progress pictures when you are in the zone and the paint comes out so quickly. x_x There are many things I'm still learning while getting into this aspect of the hobby and there are countless tutorials available so if you are looking to get into airbrushing don't be overwhelmed either! If you are a reader like me and like to know what you're getting into I found this guide very helpful: Airbrush Basics It gets more into the technicality of using your airbrush but the guide is still very easy to understand so I really recommend it. Youtube videos are also very helpful especially if you have a certain brand of airbrush or if you're just looking up basic techniques on how to use it.

Stuff I recommend before actually painting a figure that I've learned:

  • Take your airbrush apart beforehand so you will know how to clean it between changing colors! Once you start touching your airbrush and learning where the parts go it becomes a lot less scary. For example, I was really worried about bending the tip of the needle in my airbrush since it is supposedly very fragile but the whole piece is sturdy metal so as long as you are careful with it you should have no problem.
  • Practice with food coloring and water so you can get an idea of what pressure works best and how the trigger works. This was really important on my end since I started out with Tamiya flat blue acrylic (see some of the pics below) and it was coming out all spotty. When I practiced with water and food coloring I realized that I wasn't thinning my paint enough. It has to be really, REALLY thin to work properly.
My madman scribbles before any painting even occurred

  • Do NOT forget to wear a good mask and keep your area ventilated! I had a mask on when spraying paint and alcohol so obviously I didn't smell anything but after I took that mask off...well my room smelled like a chemistry lab even with my window wide open and I know that because I have had experience in chemistry labs lol
  • Save yourself some work and buy a tabletop cleaning station. They are designed where you put your airbrush in a little hole and spray into it to clear out excess paint or to spray alcohol/water through it to clean your airbrush (see below). This allows you to keep all of your waste in one spot and dispose of it safely later.
And now more for the fun part :p Here are some work-in-progress pictures of Remilia and my airbrush:

I use an Iwata HP-CS airbrush and an Iwata Smart Jet compressor. I will be using Tamiya acrylic paints for Remilia. I thin them roughly 1:1 with 91% isopropyl alcohol. I tried 70% isopropyl alcohol at first because I had it on-hand but it doesn't dry fast enough. I have also read that you can use Windex safely and effectively.

Another thing I realized that is so different from hand-brushing...the paint goes on so thin! I know that sounds like common sense but you really have to make sure your paints are highly pigmented because they can come out completely different on a figure vs. in the bottle. 
To get this color I added in a bunch of Tamiya Red and a little Yellow
After like 1 coat?
It came out SO bright orange! I don't get it since the color is so red in the cup D: It's what I wanted but still lol
Not sure if I like this color...I mixed some Tamiya Red and one drop of Black and then covered it with Tamiya Clear Red
Another small kind of 'duh' moment I had was using different color primers. I have only ever really used grey Tamiya primer since I could hand-brush many coats of paint over it but now I'm realizing with an airbrush that isn't possible. Now I have to strip the primer off of Remilia's skin and re-prime it in white so I can spray flesh tone on it...>_>

Anyway that's all the pictures that I have right now. I recently came back to my apartment so I have to get everything set up again so it may be a little bit before I finish this kit. Using an airbrush is much easier than I thought though, you just have to make sure that your paints are thinned appropriately and you understand how color mixing works since that will really help you. I hope that posting this inspires some of you to try airbrushing if you're a little scared too. Until next time!

Monday, December 8, 2014

Life + Ques Q Chibi Remilia Updates

Hi everyone! It's been quite a while since my last post but I have received a couple of messages either on MFC or on other forums asking about my blog so I figured (HAH) I should show a little bit of what I've been working on and how life is going.

I am graduating in about two weeks and while I couldn't be happier it's kind of overwhelming and I'm not really sure how to handle it. I purchased my cap and gown today and it's just really weird hearing everyone tell me congratulations :S I still have an exam on Wednesday and finals next week and then it's time for the job hunt...but at least I'll have more time to work on GKs!

Other life stuff: my cute dog fractured both bones in his front left leg a couple of weeks ago and is going in for x-rays on Wednesday so I'm hoping that it is mending well. He acts like it's mending well and tries to run everywhere and jump on the furniture so I'm hoping that's a good sign. I also remember posting about making some life changes in my diet and they are working really well! I'm down ~20 lbs. so far and have less than 10 lbs. to go to reach what I think is my goal weight (think bc it's been a long time since I have been that weight >_>). For the first time in a long time I'm now in the "normal" BMI category so that is really exciting for me :D The bad part is that I haven't been working out that much so I need to start toning up lol.

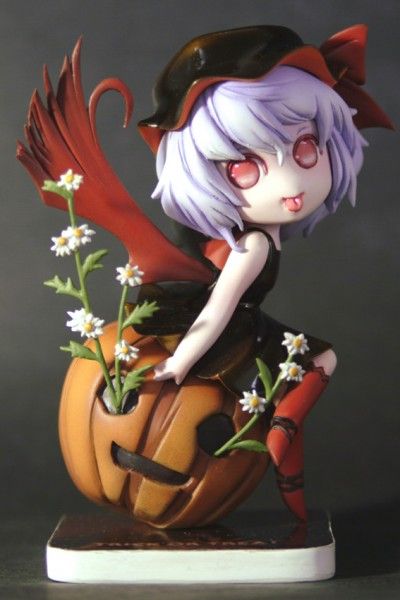
And as promised I thought I would show what I've been working on. I actually haven't been working on the Mage from 7th Dragon. Instead I got in a huge Halloween mood and ended up almost completely finishing a kit of Remilia Scarlet from Touhou Project by Ques Q. I say almost because I finished priming and she is now sitting in a box waiting to be sprayed by my airbrush >_> I wanted to finish this kit before Halloween but as always school got in the way and I couldn't finish her in time. Soooo I would say look forward to this kit probably in mid-to-late January after I get back from my winter vacation and have some time to sit down and ponder my life decisions OTL

ANYWAY like I mentioned this kit is from Ques Q, the same people who make a lot of PVC figures. As far as I am aware the original circle that produced this kit was Gate River and then Ques Q picked the cast up and made a PVC of her along with a little pumpkin Flandre. Both of them are based off of an illustration by Yuge Sasatarou. You can view her (?) blog here if this art style appeals to you: Yuge Sasatarou's Blog


The PVC versions of these figures are also really cute but I decided to skip out because I already had the resin version of Remilia and I was not as big of a fan of Flandre.

Cute but also their bases ended up being black squares :/ On the right is the Gate River official pic.
The PVC figures just aren't doing it for me because I wanted to change the color scheme a little bit and make Remilia's colors a little darker. She's a really cute kit but the PVC version is a little too bright and it looks like Halloween candy colors to me...that sounds weird haha.

So I actually found this kit on Mandarake and got a pretty good deal on her but if you are interested in this kit or ANY of Ques Q's kits actually I recommend you check out their website. If you use a proxy you can buy the kits directly from them here. The cast quality is excellent as I'll show you shortly and the price is reasonable for an original GK (about the same as their PVC figures) so I recommend you check it out!


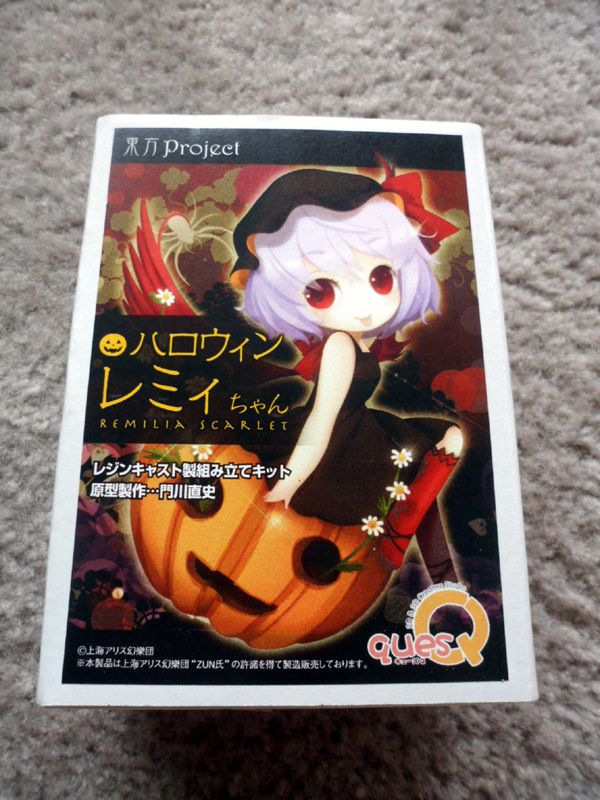
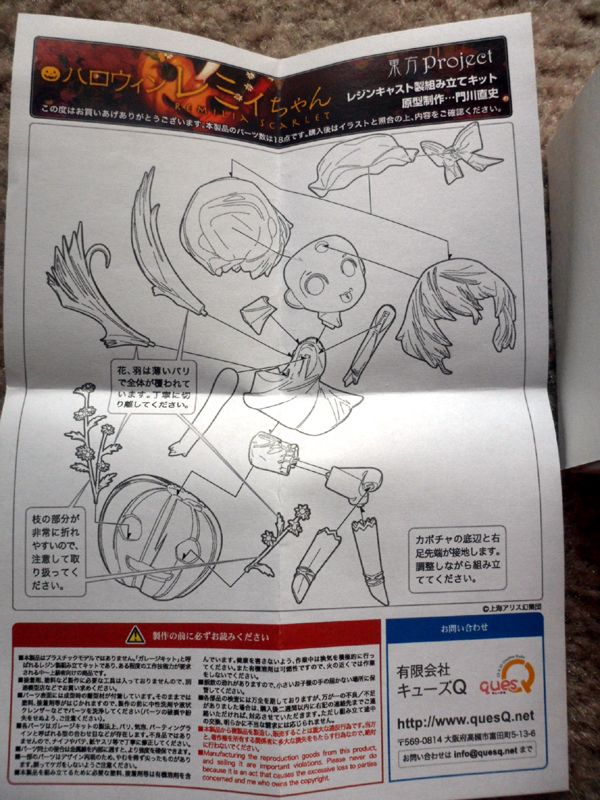
The box is 14cm x 10cm x 7cm so it's pretty small. I didn't measure how tall the kit was once I stuck her together but it is pretty much the same as the PVC (about 110mm). The parts sheet is pretty standard as usual and just tells you where to put the tiny details. I like how they put the DON'T RECAST in English as well as Japanese. Seriously guys if you can buy a great cast from Ques Q for a decent price don't settle for recast quality :(

Thanks Ques Q!
And now onto the pics of the actual product! I unfortunately don't have too many pictures of the building process for this kit mainly because it is a really nice cast. There were a number of air bubbles I had to fill in but I don't think I got any pictures of those. As always if you would like to see a higher quality photo simply right click and the photo in a new tab. The resin actually is that white. I didn't do any Photoshopping to enhance the colors which really says something about how clean the quality is. Unfortunately the Ques Q cast did not include a little resin base like the original Gate River cast. I have a ton of acrylic square bases though so I think that I can get Remi to fit on one.

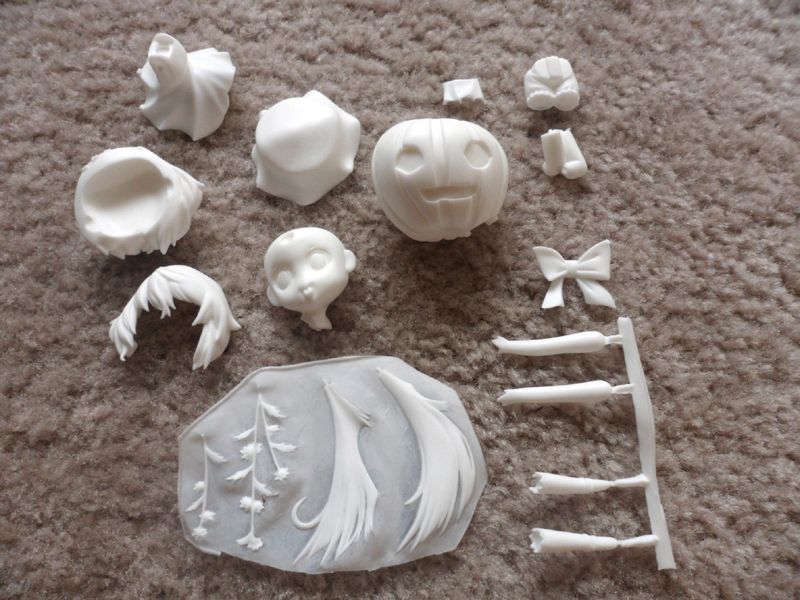
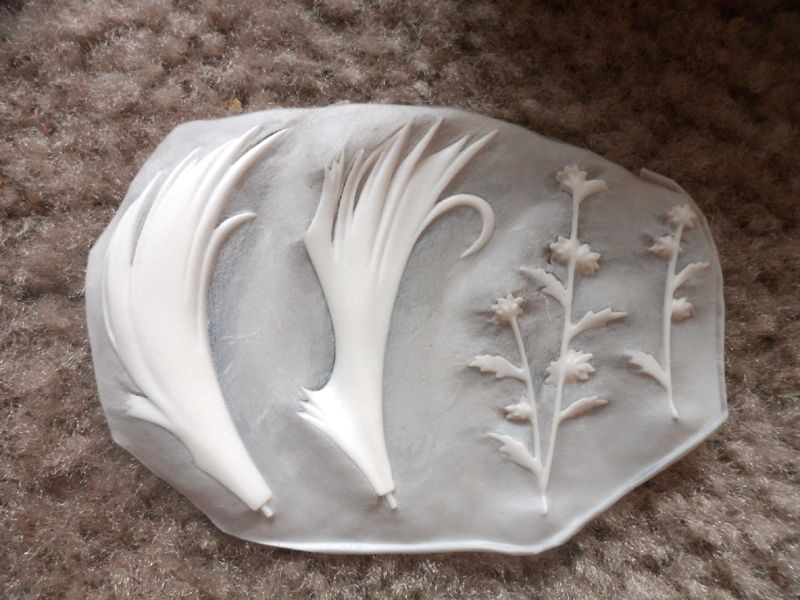
Here are all of the parts. The details on the wings and the flowers are cast in a very fine sheet of resin that was easy to pull apart.
The head pieces fit in perfectly
Seriously this stuff was like paper thin
It took quite a while to shave off all that stuff but it's looking good now! The key to getting seamlines off of fine pieces is a sharp X-acto knife.
Getting a spooky bath

Having guidelines for the eyes is really nice, it's like that Girls the Gathering kit I had that's one of my favorites.

That's all the pictures that I have so far! There's still a couple more things I have to do before painting like making sure the pins still fit well, finishing filling in some air bubbles and then re-priming but other than that she's ready for some real enamel paints :B Thanks for taking the time to read this far and if I don't post before the New Year have a Happy Holiday season and a great New Years!

Thursday, August 1, 2013

Halloween Remilia Scarlet - Ques Q

SHE'S HEEEEEEEEERE I am so happy
The GK in question
I have been waiting patiently for this GK since she was first shown at WF2011 Winter but she never seemed to show up for the right price and pretty much anything with the circle name Gate River is impossible to find even on Y!J OTL. Then Ques Q (bless that company) decided to come along and pick up this sculpt along with a Flandre!!!! Ques Q is really, really good about making all of their PVC into resin as well so they decided to release a resin version which I found on the Jp Mandarake for 5k :D Apparently Ques Q also sells their resin versions directly on their website for 6k so it's worth looking into if you have a proxy.
Eeeee Remi-chan
Instruction sheet
She came in a few days ago and I am thrilled. I've never bought from Ques Q before but the resin quality is beautiful and there are only a few tabs that need to be sanded before she's ready for priming and painting. Here's a few part pics :3:

All of the parts, notice how white and clean the resin is compared to some other casts
Wings + Flower pieces. Amazed that the stuff surrounding them is actually a VERY
thin layer of resin so you can just pop them out and lightly sand the sides
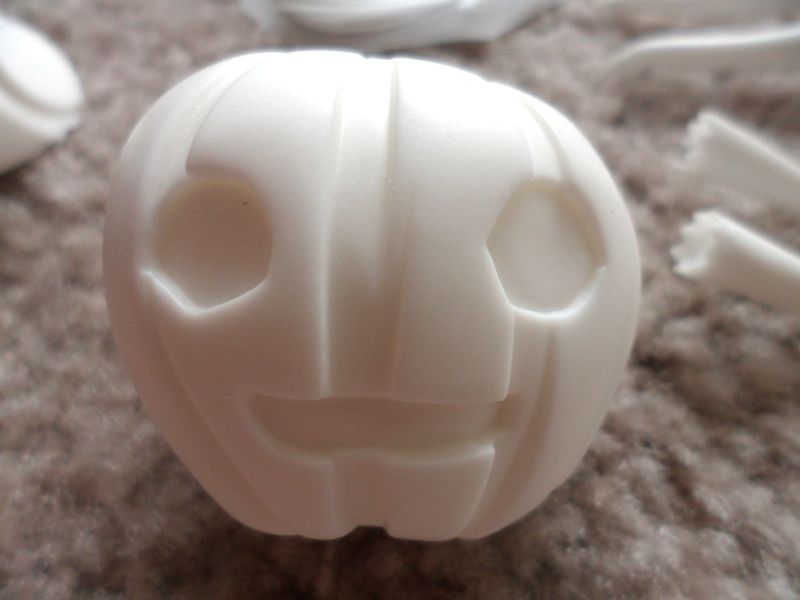
Very smiley pumpkin
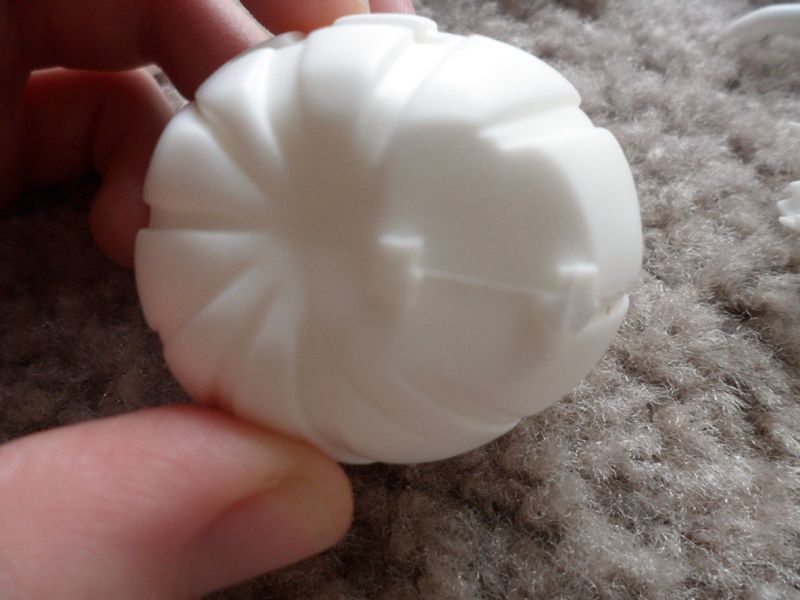
The largest tabs were on the bottom of the pumpkin
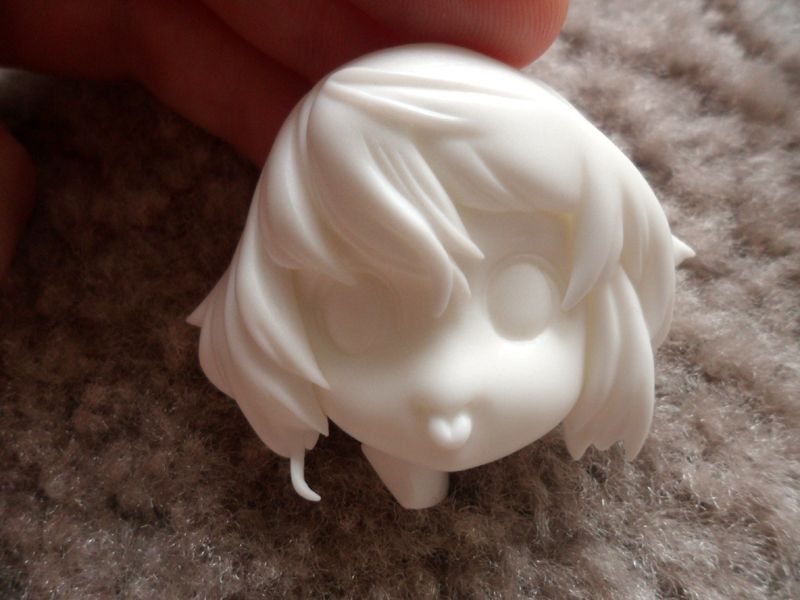
Her face is so precious
The kit is probably around 4" high when built but she's big enough you can get in there and paint lots of details. This is exactly the type of kit I love and I am thrilled to be able to paint her especially since I am not a fan of how the PVC's eyes turned out, they're a lot less dreamy and look more like decals lol. Now just have to decide how to paint her...