Showing posts with label anime. Show all posts

Friday, November 11, 2016

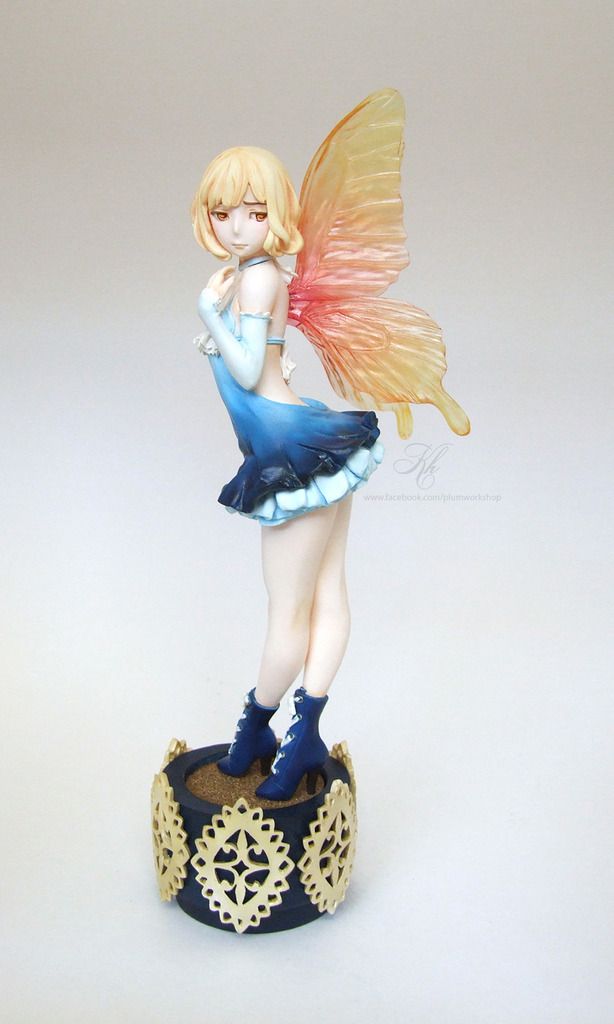
Nonscale Fairy - Original Character

Hi everyone! :) Long time no post. Today I’d like to share my 12th finished work.

This little Fairy is by Meikyuu no Koe. Unfortunately this kit is extremely rare and I don’t even know if this circle sculpts anymore (most of her kits were made 2011-2012) so my copy is a recast. However, I hope that my paintjob shows how beautiful her sculpt is – this is truly one of my favorite kits in my collection and it took me a long time to build up the courage to paint her.

When I think of fairies I usually think of pale, pastel creatures and that’s how I was initially planning to paint this little gal. However, I always like to challenge myself when building kits and paint something that looks completely different from other artists’ work. I decided to settle on a fairy that represents a sunset.

If you haven't done so already please take a look at my Facebook page! I update it more regularly than here, this blog has become more of a place to keep a catalog of my finished works. Plum Workshop


Sunday, September 6, 2015

Busy Bee Life and New Kits

Hello everyone, long time no post! I've been very inactive on this blog lately due to a combination of life and venturing out into the real world ^^ I don't want to bore anyone with the details but in short the past few months I've been enjoying gainful employment, moved into a house, and have been doing a bit of travelling (PAX Prime anyone?) so I haven't had much time to sit down and focus on my kits.

This is partially my fault since I now have no work space...the desk I've been using to build stuff on is actually my computer desk but now that we have a dedicated computer room I don't want to haul all my paints and stuff across the house and get everything covered in resin. >_> Hopefully in the next few weeks I'll be able to acquire a desk so I can sit down and focus on kits. This hasn't stopped me from purchasing a number of items though - I still enjoy hoarding and collecting resin when I feel like spoiling myself :p If it isn't clothing or cosmetics (another more recent obsession) it's garage kits hehe.

With that said I just wanted to show off a couple of recent purchases I've made since I've been wanting to gush about them for a while but I don't want to bother anyone. Silly me didn't realize that I could rant on my own blog!

Habenero-tan set by Midass


This was a complete impulse purchase I made on Mandarake back in May. I have no idea why I decide to buy this kit because I'm not familiar with Habenero-tan besides the fact that she's a mascot and likes to sit on a toilet (because it has to do with spicy food I guess???) but I couldn't pass it up for 2,000 yen. The coolest part is that this kit came with an original 4koma and post card. I'm pretty sure the post card is signed by the creator of Habenero-tan but it might also be printed on...either way the quality of the paper is really high quality and it's a pretty cool freebie. I did a ton of hunting on Midass but it appears this is either the only kit or one of very few kits they created so maybe they were just an unfortunate company that flopped. The kit is super straight forward and they're both very small so when/if I build this set I'll be sure to take a bunch of photos of all the bonus goodies.


Hagoromo-chan by Kilohana
AHHHHHHHHHHHH!!! This kit is an absolutely dream of mine to own and I legitimately freaked out when I found this one for sale. A fellow GK acquaintance CinnamonSwirls recently decided to cut down on her kits and put this original one up for sale and I was lucky enough to see it and snatch her up. I have a very soft spot for small fantasy kits involving skinny/ethereal fairies and this figure is everything that I love all wrapped up into one convenient resin package. The level of detail is perfect for someone like me. To give you an example the flower on the top of her head has these little anthers (see pic to the right)...every single one of those anthers needs to be glued on separately and painted onto the flower petal base. You also can't really tell in the picture but she comes with a bunch of clear parts too! The snail, cherries, wings, little shoes, hair and a couple of other pieces are made of clear resin which adds a very interesting contrast to the rest of the kit. I've never painted clear parts before so I'll most likely have to bring out my airbrush for those. I could rant about this kit a lot because I'm so excited it's in my possession but again that will have to wait until I'm actually building it lol.

Little Bride by Munchkin

Forewarning: This kit is a recast. If you're not OK with that please just skip this little section since I'm not about to discuss the ethics of selling recasts on my blog atm. I really wanted this kit immediately since Halloween is coming up and I want an excuse to paint something a little spookier (not that this is spooky...at all...). After my Mage kit I want to do something darker and a little bloodier and I've been eyeing her since I've seen so many beautiful versions of this kit. She's so versatile too! You can paint her to look more like a normal little girl or go completely Monster High and use all sorts of colors like greens and purples ^^ Every single build I've seen of her looks completely different and unique which isn't something you see too often. She doesn't have very many parts and is pretty small (~15cm fully built) so I'm hoping for a quick and relatively painless build. I have no idea what kind of color scheme to give her though...this will be my next kit though so expect to see a lot more of her soon.


That's all I have for now so thanks for reading ^^ I hope to post a lot more soon.

Sunday, May 10, 2015

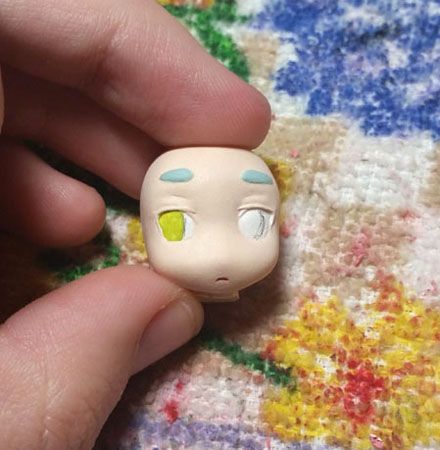
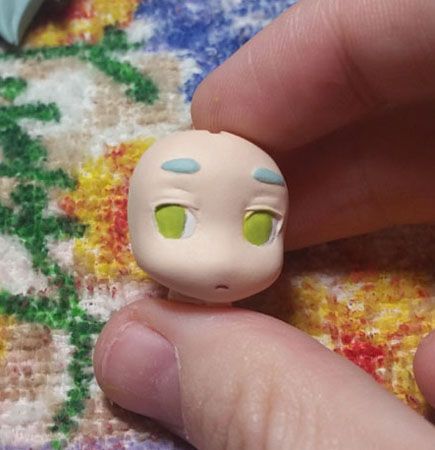
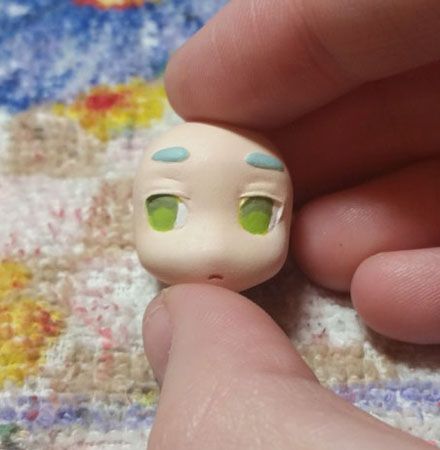
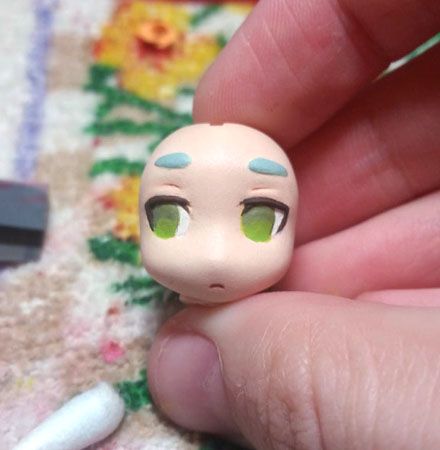
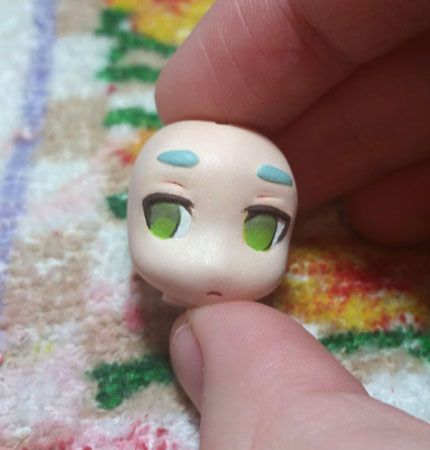
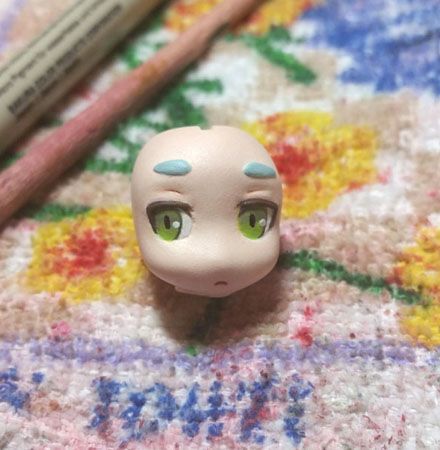
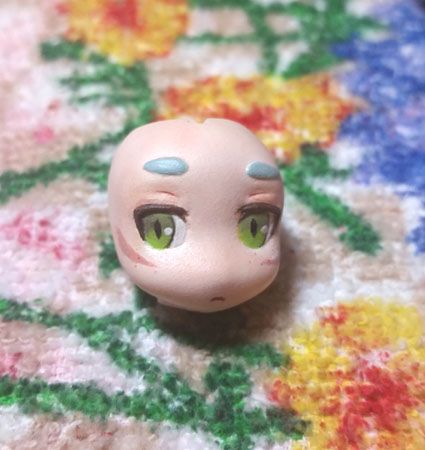
Painting Eyes: A Quick Walkthrough

You know those times when you get so ambitious on a project you end up doing way more than is necessary? That is definitely me with this garage kit right now. Because I'm feeling slightly insane and want to put off the nervousness from starting my job on Monday I decided to create a little WIP on how I paint eyes. I know I did one before in my GK Compendium series but it's always fun to take a bunch of photos and see everything step-by-step. So for those who are seasoned pros and curious or for those who are just scared of hand-painting eyes this is for you!

*Note: These eyes are approximately 0.5cm in height and length. You CAN paint those tiny eyes as long as you have thin paintbrushes ;)

I started out by painting the schlera a nice off-white. I'm a huge fan of the acrylic paint "Seashell White" by Delta Ceramcoat and use it for pretty much everything since regular white paint is a little too bright for me. Make an outline in pencil where you want to paint your iris and make sure they are facing the same direction.
Paint the lightest color of your eye in thin coats. The consistency of your paint is very important here. If it's too runny paint will run all over your eyeball but if it's too thick you'll end up with streaky lines. Try to stay within the lines you created with pencil. Make sure both eyes have around the same size iris or you'll get a weird looking crazy eye lol.

Apply the next color onto your eye. It's up to you how you do this but generally try to paint one to two shades darker on top of your lightest color - this will ensure that the contrast on your eye isn't too striking (in a bad way lol). I like to paint in a U-shape that ends around halfway on the eyeball.

The next few steps can be done in any order and I've mixed it up before so it just depends on your mood. ^^ In this case I decided to paint her eyelashes. On some kits you're lucky and the eyelids are already sculpted for you but sometimes you have to paint onto a flat surface. The key to painting eyelashes is sharp lines - notice how the ends of my eyelashes are very pointy. There are thousands of different eye styles but almost all of them have an angle somewhere in there. Get confident with painting angles! At this point I also added an upper eye crease with a 0.005 brown micron pen.

Oh also you can paint the eyelashes whatever color you want, it depends on the colors of your kit I guess. I usually paint my eyelashes black but in this case it was way too harsh so I mixed two different colors of brown together (it's still pretty dark though haha).

Not much has changed in this step except I decided to outline her eye with a 0.05mm mechanical pencil.

Lastly I added the classic anime eye shine (white dot) and her pupil. This also varies from character to character but I was going for more of a striking cat eye slit.

And here's another tiny thing I did just to show you how much of a difference a simple change in lines can entirely change the kit's appearance. Notice how the iris in the picture above is rounded compared to the picture below where the iris is pointed at the ends. Feels more like a feline, right?

I also added her markings and shaded a little bit above on her eyelid.

At this point I had already finished my kit but did a couple of other things like making her freckles a little larger and adding some more shading on her face. You can't see it in this photo but I also added Pledge Future FloorCare to her eyes to make them super shiny. I did this on my Nostradamus kit as well and it really makes them stand out ^^

EH CLOSE ENOUGH. I just realized how blue my kit's hair looks though...I didn't even use blue idk how that happened LOL

There are countless ways you can paint your eyes whether it's changing the color of the iris, the shape of the eyelashes or where you put that classic anime shine. I find it helpful to experiment with different eye types by drawing them on paper as well. I generally add two to three colors on my eyes to create a gradient but it depends how ambitious and/or comfortable you are with your kit. Also helpful is how big the eyes on your kit are - the bigger your eye generally the more detail you can add.

And also for the love of god PLEASE do not forget to paint eyebrows on your kit. I have an obsession thing for strong eyebrow game and every time I see a kit without eyebrows I silently weep for the poor character whose eyebrows were singed off in a horrible accident. 

Stay tuned tomorrow (well technically today now) for the finished product and thanks for reading ^^

Tuesday, August 13, 2013

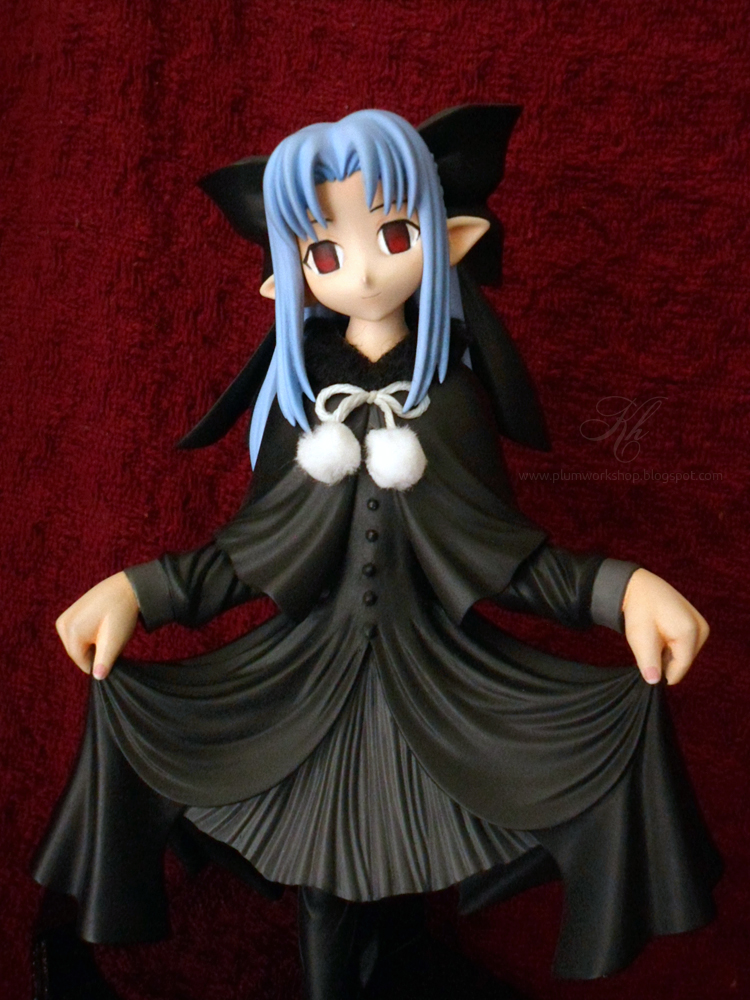
1/6 Len - Melty Blood

Len is my 8th kit completed in  August 2013. There's a bit of a backstory involving Len; my boyfriend is a Type-Moon fan and Len is one of his favorite characters. One day when I was surfing Mandarake I found Len for 3,000 yen on Mandarake. I quickly asked him if he wanted her and he did :p Ironically he had a picture of this kit from years ago but had no idea where she came from. Funny how that works out haha

Len was completed using acrylic paints, a brush, and pastels. She was also part of a WIP series I created here so you can take a look at how I build figures. Although she was a pretty easy (even boring) build I'm glad that she came out the way I imagined. I'm especially happy with her eyes :)

Thank you for taking a look!

Extra stuff: Puttying + Base

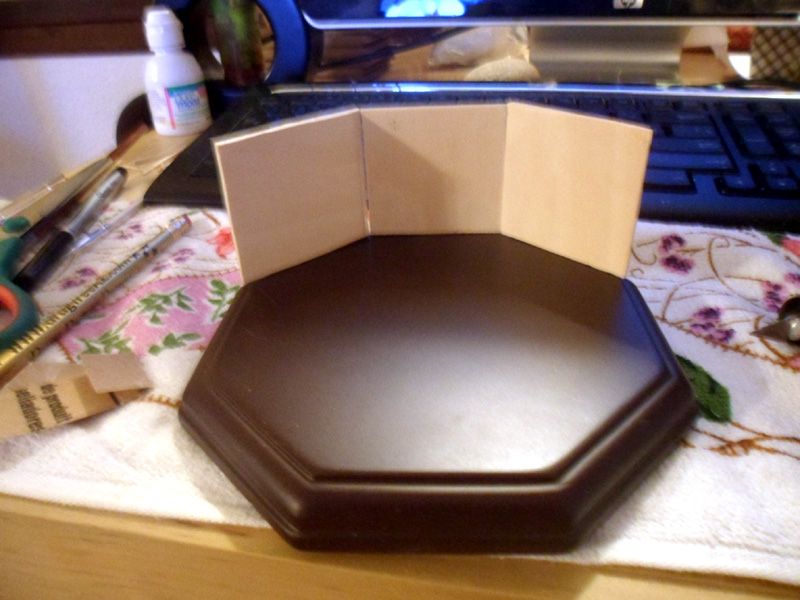
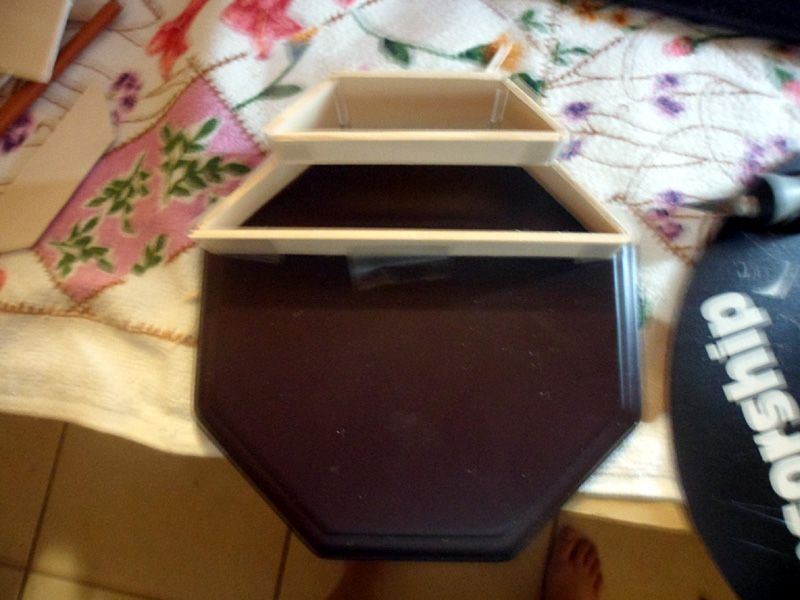
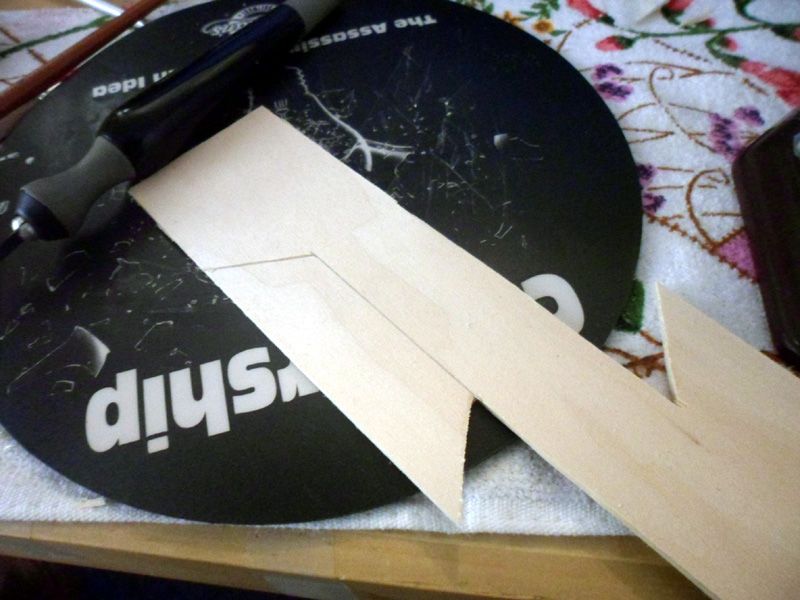
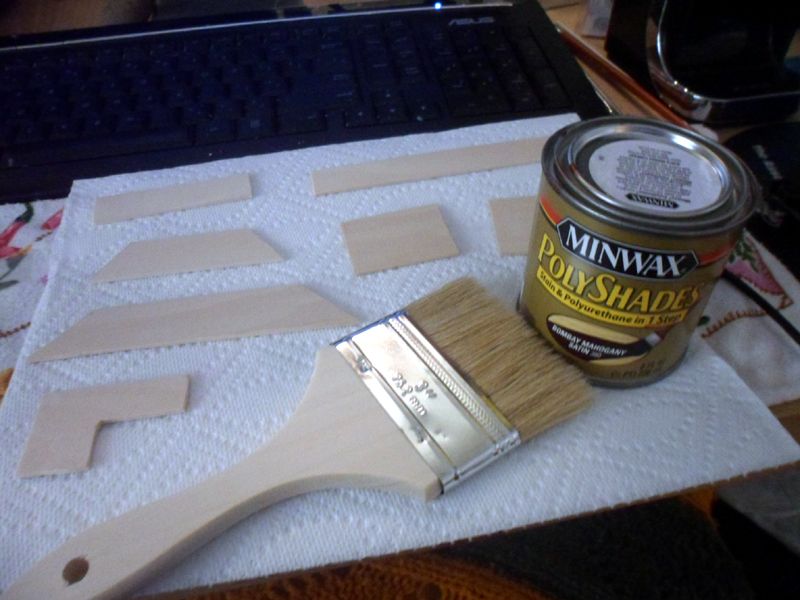
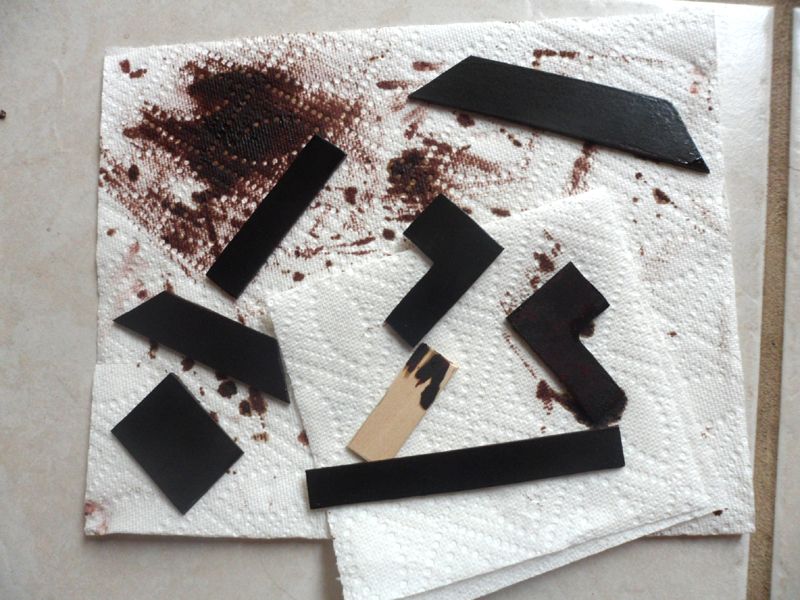
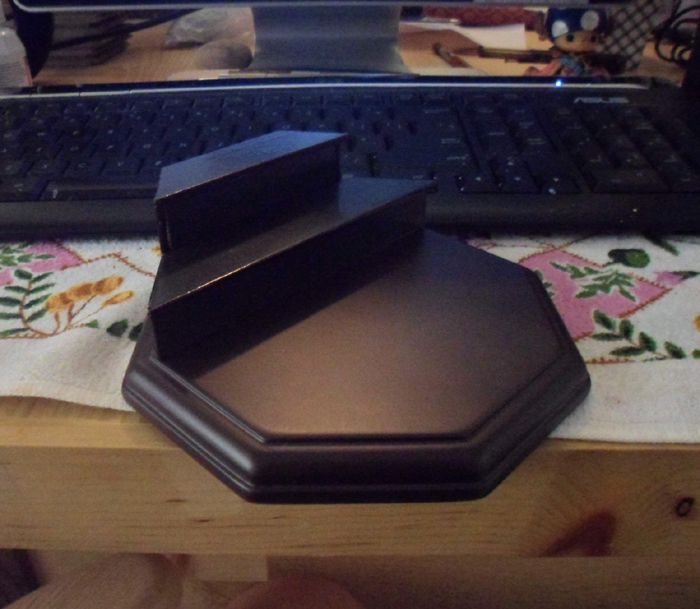
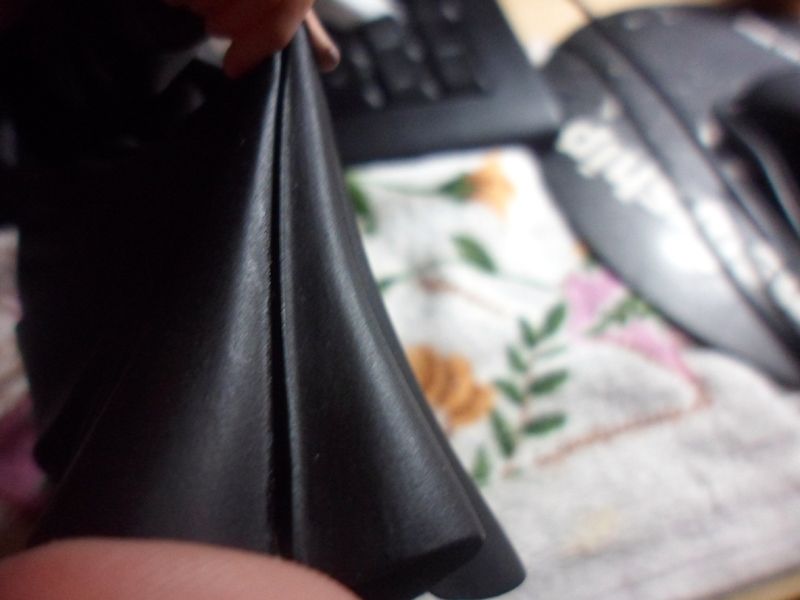
Since I didn't really have any room left in my WIP and I didn't want to drag things out I decided I'd just make a quick post about how I built the base and final work on my kit. I have never really built anything on a base before but I thought it would be cool if Len had a little flight of stairs so it looks like she walked down them and curtsied for a gentleman or something. I thought it would be easy...joke's on me LOL

Measuring the wood...it's a little too high here so I had to cut it down
After measuring each part I decided I wanted two stairs
Cutting the stairs out


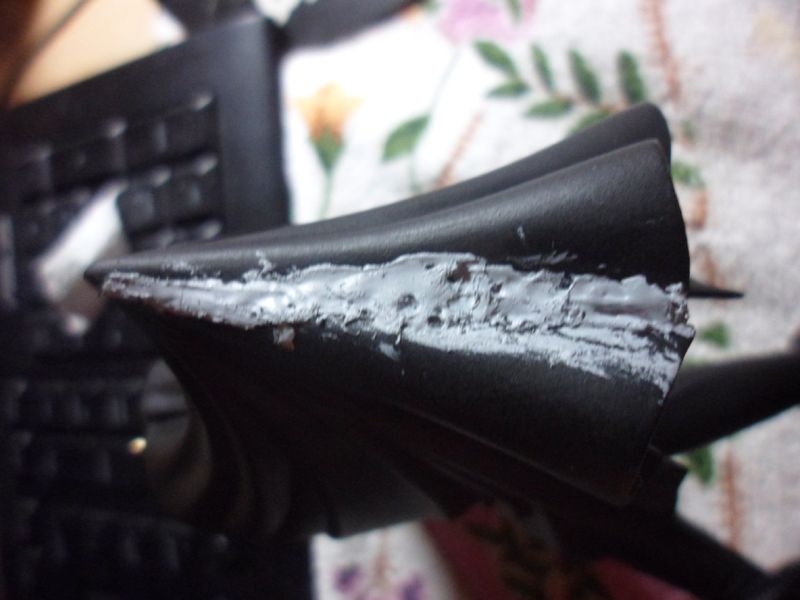
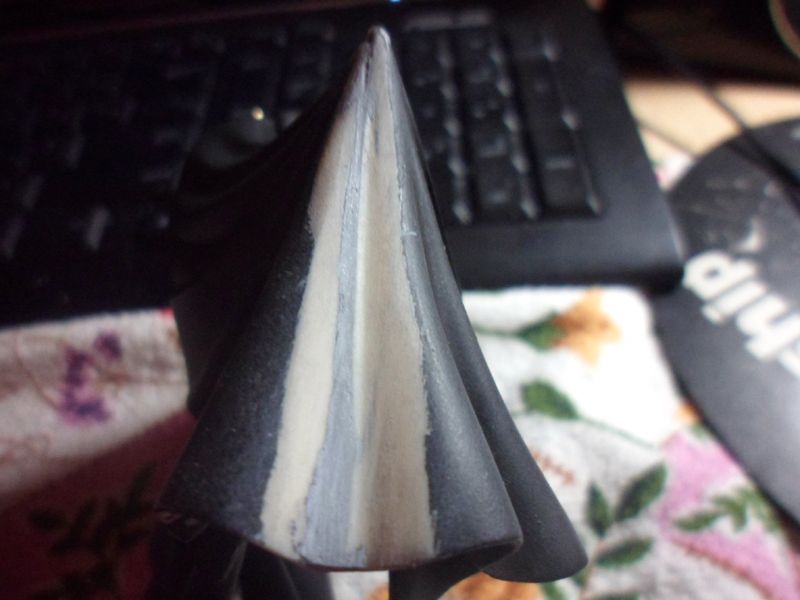
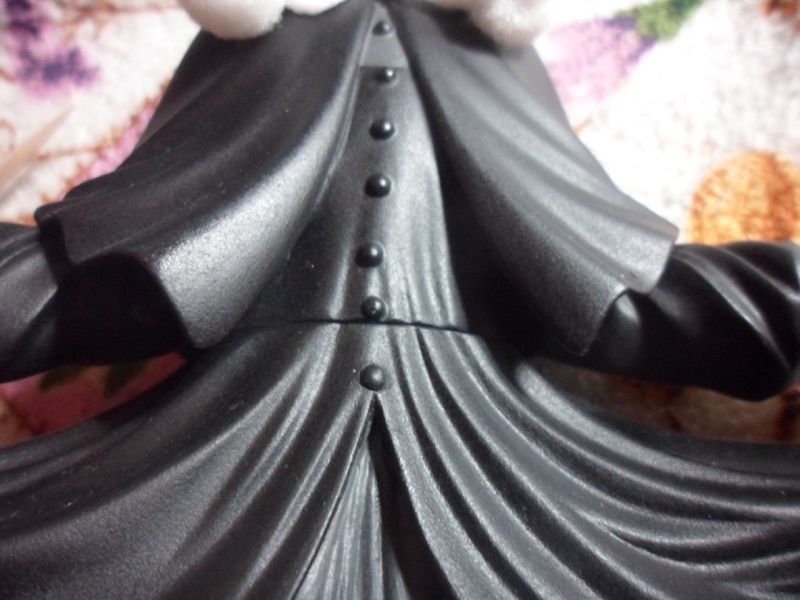
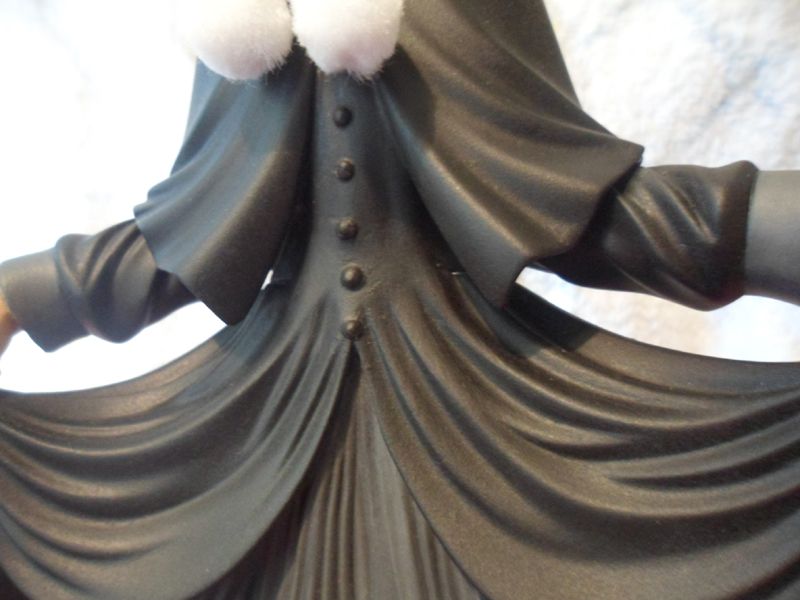
Puttying/hiding gaps is pretty straightforward, you just have to have a lot of patience when it comes to seeing dents and errors. These gaps drove me nuts and not just because they were difficult...I was actually done with my kit a few days ago and when I was taking a few photos of Len she fell and the parts I puttied completely cracked -_______- Then when I redid them they cracked AGAIN so I just decided to reglue and fix the kit all over again. Anyway here is a few pictures of the puttying process:

^ I'm still wondering why her dress didn't just come in one piece...maybe because the arms would be too hard to attach? Either way I'm glad it's over lol

GK Compendium Part 4: Painting, Shading, and Sealing (2)

This blog post has also been crossposted over on my account on MFC here.

Hi and thanks for reading my WIP! These final steps are always my favorite part of the whole building process because the garage kit pops when in color. This post is also VERY PICTURE HEAVY because I wanted people to see how shading and taking time to paint the eyes works. This is PART TWO of the painting process and I hope this post is helpful and persuades some of you who are scared to paint a garage kit to start your first one.

Previous WIP posts can be found here:

GK Compendium Part 4: Painting, Shading, and Sealing (1)

This blog post has also been crossposted over on my account on MFC here.

Hi and thanks for reading one of the last parts of my WIP! These final steps are always my favorite part of the whole building process because the garage kit pops when in color. This post is PICTURE HEAVY because I wanted people to see how layers make a difference and how much time it takes me to paint my kit. I have also split this section into TWO PARTS because one would be way too picture-intensive. I hope this post is helpful and persuades some of you who are scared to paint a garage kit to start your first one.

Previous WIP posts can be found here:

Monday, July 1, 2013

Lots of quick updates!

Hi everyone :) I figured I'd post another little update about the progress of my Len WIP as well as some Animal Crossing stuff! The painting is going well on Len. I really only have her skin tone, a few spots on her outfit/details, the face, and shading to do before she's finished. Here's a shot of her face so far, it needs just a few more coats of paint before I'm ready to do the detail work on her like her eyes and mouth (*´・v・)

Introducing Momo!

Hi everyone! I updated some features on my blog like the Header, Affiliates, and Links because I have some fancy new artwork and a new mascot! I would like to thank Butcherer (or PineappleSkewer on MFC) for the wonderful job she did reinventing my ideas. Go commission some art, her prices are great and she does a beautiful job!

Now a little bit about my mascot~! When I in high school I used to draw a character named Momo (and sometimes Sumomo). Momo had a reputation among my friends because I'd doodle her on anything with a flat surface. After I graduated I stopped drawing her but  when I wanted to make this blog I immediately thought of her. Sumomo (Japanese Plum) and Momo (Peach) are two very different things but they go hand-in-hand for me and remind me of when I started getting into Japanese culture.

Here's a few quick facts about Momo:

Name: Momo
Personality: excitable, creative, thrifty
Hobbies: Building garage kits, painting, cooking (she's terrible)
Likes: Nature, playing games, painting, animals
Dislikes: Bugs (esp. beetles), cauliflower, rude people

See you next time!

Thursday, May 30, 2013

GK Compendium Part 3: Putty and Priming


This blog post has also been crossposted over on my account on MFC here.

 Hi, I'm back! Now that school is out I'm ready to start building GKs again and finally finish this WIP. I have to apologize first; a lot of the work on this kit was done when I had a few moments of spare time during the semester so I forgot to take a lot of pictures. Puttying and priming are very boring steps imo and some of it is easy (you spray stuff...with a can) so although this post is text-heavy I hope I can explain well enough and have the pictures provide a supplement. The next blog post will be my final one and will cover painting, sealing, and maybe some last touch-ups so look forward to that long one :)

The past two blog posts can be located here:

Part 1: Supplies and Background
Part 2: Sanding, Washing, Priming


Thursday, May 23, 2013

GK Compendium Part 2: Sanding, Washing, Pinning

This blog post has also been crossposted over on my account on MFC here.


Hello everyone and thanks for reading my blog! Today I will be continuing my series of posts on how to assemble and display a garage kit. The previous post about supplies can be located here. I swore to myself I'd get this post out before school started so I'm glad I could finish it.

I really dislike prepping a kit; it's tedious and sometimes more work than it's worth. It's also boring to look at in photos since there's basically just a 'before' and 'after' photo lol. Hopefully this post will help clear up some confusion about the prepping process. If you want larger pics or are having trouble seeing the details just right click and open the image in a new tab :)

Part 1 is located here: Supplies and Background

GK Compendium Part 1: Background and Supplies

This blog post has also been crossposted over on my account on MFC here.


Hi! I'm Muntoe and today I've decided to write a blog about how to build a garage kit. This is one of my favorite things to do in my spare time and I've noticed a lot of people have always wanted to try building but don't really know where to begin. Today I'm going to give you a bit of background and then explain in-depth the supplies that I use. Prepare for a lot of text. There are MANY different ways and materials to build a resin kit but I am going to explain how I personally build resin kits. I hope this will help anyone who is unsure of how to start out.

Nonscale Fuu - Samurai Champloo

Fuu is my 5th kit sculpted by Vice and completed in January 2012! This kit was actually a contest entry for a  garage kit blog I'm on. Fuu was my first larger scaled figure after a bunch of chibis and her cast wasn't the best so I was unsure if I could finish the task. Luckily I had time to paint her the way I wanted as well as eliminate ugly gaps on her neck and shoulder sleeves. Fuu was definitely more of a color study and it took large amounts of paint to get her pink kimono right lol. The sunflowers and base are meant to reflect one of the scenes in the last few episodes of the series and although I didn't have time to add leaves to the sunflowers I may tackle it someday! Thanks for looking and sorry in advance for the high volume of pics :)

Wednesday, May 22, 2013

Nonscale Koiwai Yotsuba - Yotsubato!

My 2nd kit was completed shortly after Araya in 2010 (which explains the crappy lighting). Yotsuba was relatively challenging for a beginner and I remember how I struggled to fix her to the base. The base parts came bent as well and I did not know how to fix it at the time which caused warping and the paint to peel off. Unfortunately when I moved this kit was not packed securely and she broke during transit. Currently Yotsuba is sitting in a box stripped of paint until I decide to repaint her again...


1/8 Kuga Araya - Cynthia the Mission

This is my first kit built sometime in 2010. At the time I didn't really know much about garage kits but I was excited that I could modify figures and turn them into my original characters! I added a little eye patch to this kit and changed the colors and thus my OC Tomoro was born :p Looking at it now this kit is really sad...there are so many problem areas and I went all out trying to use pens for her eyes. My biggest problem was that I didn't seal properly which gives the kit a dirty appearance on her face and stockings. These pics are pretty old and I wasn't proud of my skills which is why there is a lack of pictures. I would like to hope I've improved since then haha!