
This blog post has also been crossposted over on my account on MFC here.

Hi! I'm Muntoe and today I've decided to write a blog about how to build a garage kit. This is one of my favorite things to do in my spare time and I've noticed a lot of people have always wanted to try building but don't really know where to begin. Today I'm going to give you a bit of background and then explain in-depth the supplies that I use. Prepare for a lot of text. There are MANY different ways and materials to build a resin kit but I am going to explain how I personally build resin kits. I hope this will help anyone who is unsure of how to start out.
The name 'garage kit' comes from a time in the past when hobbyists used to build and create resin models in their garages. They are usually cast in polyurethane resin and depict a variety of characters and genres from horror, television, anime, comics, etc. Garage kits are usually unpainted and unassembled. For more information there is a Wikipedia page here.
So what's the difference between an original kit and a recast?
When people say a resin kit is 'original' it means that it comes directly from the sculptor. These kits were at one time crafted by the sculptor and sold, usually at festivals held a few times a year. Since I'm primarily covering Japanese resin kits I'll focus on those. There are two major garage kit festivals that I know of held in Japan. One is Wonder Festival. WF (or Wonfes for slang) is the biggest festival of the year for sculptors. Since it is the biggest it's also when most of the new sculpts come out. The other major festival is Treasure Festa which is held a few times a year. In order to sell resin kits at a festival an artist must submit an application and receive special permission to distribute a kit. This is due to licensing laws in Japan that pertain to pretty much everything. Therefore, these kits are usually distributed in small batches. This can drive the price of a particular kit up very high, especially if it's by a famous sculptor. The reason some sculptors can sell their kits online and internationally (ex. Kitutehu and Modeler-T) is because they sculpted original characters that are not licensed. A few examples are Modeler-T's Cosette, Kitutehu's COLORS line, Sakurako Ishinaga's Melty Snow, etc.
So what's a recast? A recast is an illegal copy (a.k.a. bootleg) of a garage kit. It is usually much lower in price and quality compared to an original resin kit. A few well known websites are E2046.com, Hobby Fan, and many sellers on Ebay. Among the recasts I've found that there are two types of resin: resin without a ton of problems and Thai recasts. Thai recasts are something you NEVER want to experience and discourage a lot of people who start out. These casts are primarily sold on Ebay and are very cheap. They look like they're easy to build in the product pictures but when you receive the product it's something entirely different. Thai resin is very brittle, sometimes crumbly, and yellow. It is extremely hard to work with this type of resin and even harder to make it work out and look decent. For the love of everything figure related, ABSOLUTELY DO NOT purchase these types of casts!
-------------------------------------------------------------------------------------------------------------------------------------------------------------
With that background information done, I will now focus on the supplies that I use. Again, this is what I use to build my kits. Other builders may recommend different supplies because there is no one way to build a resin kit! Everyone has different techniques and it's up to the individual to find out what brand and type of supplies work best for them. This guide is merely intended to get you thinking about what you absolutely need to build a kit. One more thing: I hand paint my resin kits. This requires an entirely different technique compared to airbrushing resin. Since most people aren't willing to shell out the $300+ for an excellent compressor and airbrush for their first or second kit this guide will cover how to paint for poor people (like me! xD). I also attempted to number everything according to how you should build a kit in real-life but I'll cover the real building steps later so whatever lol. With that, let's start!
SAFETY
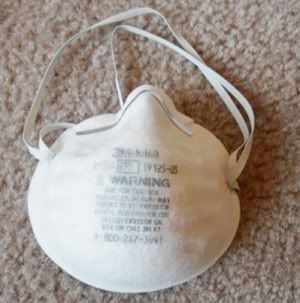
The other must-have item I use is latex gloves. Latex gloves are handy because they keep your kit free from oils, dirt, paint and contaminants on your hands. They are also extremely useful when you are priming your kit. If you don't have an airbrush you'll probably have to use spray can bottles which have a wide spray area (more about this later). Gloves protect your hands from primer and just keep them clean in general. :p
1) Sandpaper
Sandpaper is one of the most important things that you will need when you build a resin kit. Many resin kits have something called 'seam lines' which are literally lines of resin on the kit. This is caused by the the mold and when the two pieces are put together. If the mold is uneven, when resin is poured into it and the model is cast sometimes a line will be left over from the mismatched mold pieces. Another thing you use sandpaper on is to smooth down resin 'tabs;' tabs are extra bits of resin left over during the casting process. In most cases you just clip off the resin tab and then use sandpaper to smooth the edge down. Fine grit sandpaper is also useful for sanding down or sanding off little spots or hairs in paint. It's also a good way to achieve a smooth priming surface.
At this point you may be asking 'what the heck is a grit?' The 'grit' of sandpaper is simply the number of abrasive particles per inch of sandpaper. Therefore, 200 grit is much rougher than 1,500 grit. I use a variety of grits but I primarily use 200 grit for rough edges, 400 grit to smooth the edges and then a finer grit to finish it off. I only use high grit sandpaper when sanding primer and paint. Although there is some sandpaper specific to the hobby (ex. Tamiya brand) I've found that you can also use sandpaper from any common hardware store. You will probably want to buy water-proof sandpaper; a lot of times modelers use the 'wet-sanding' technique (dipping the sandpaper in some water and then sanding) because the resin particles go into the water rather than the air.
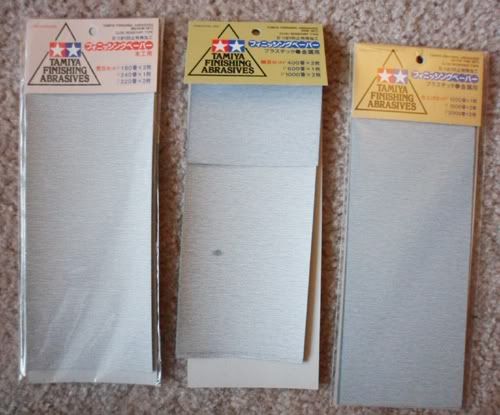 |
| This is Tamiya sandpaper designed specifically for working with models. |
2) An X-acto knife
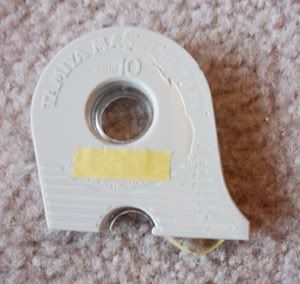
3) A bath for your kit
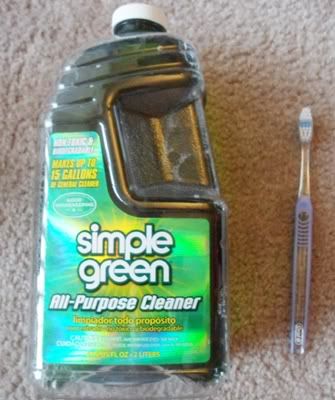
This may seem a little weird but you always have to give your kit a bath before you try to primer and paint it. Many resin kits have something called 'mold release' on them. If you ever have a kit and it's kind of naturally shiny, that's probably the mold release. Mold release sometimes impairs primer's ability to stick to the kit. There are lots of different products you can use to give your kit a bath such as Oxiclean, Purple Power (if you use this wear gloves), and Simple Green. A soft-bristled toothbrush is also handy for gently rubbing off the mold release. I typically let my kit sit in a bath for 24 hours and then rinse it off with cold water and let it air-dry.
4) A drill, drill bits, and "pins" (wire)
I've heard multiple times that people think they can just glue their kit together when they're done painting it. You can't do this!!! Resin is relatively heavy and most glues are not designed to hold up something for a long period of time (a.k.a. the laws of gravity always win). Besides, how would you keep your figure on a base? This is where a drill and pins come in handy.
There are multiple kinds of drills. Many people use electric drills or Dremels in order to pin their kit. There are also hobby hand drill (also called a pin vise) brands available. Typically the price runs pin vise > small electric hobby drill > Dremel. Drill bits are the tiny thin little things that you put into your drill. Finally, "pins" are what you use to pin your kit together. It is usually some form of wire that fits into the drill hole. Personally I use piano wire but paper clips are a cheap and affordable option. An important thing to remember: the bigger the kit, the bigger your pin should be. If you have a 1/4 kit there is no way you can use 0.64mm wire...it won't hold your kit up! I usually use 0.032", 0.025" and a larger brass wire for bigger kits. You will also need a sturdy pair of wire cutters.
A very quick explanation of how to use this tool is to drill two parts (some resin kits have guides of where to drill), cut an appropriate piece of wire, stick it in the drill holes, and push the parts together. Be careful when drilling because you want the parts to match up. I will cover this more extensively in a future blog post.
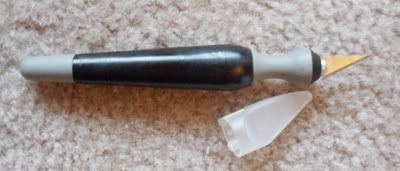
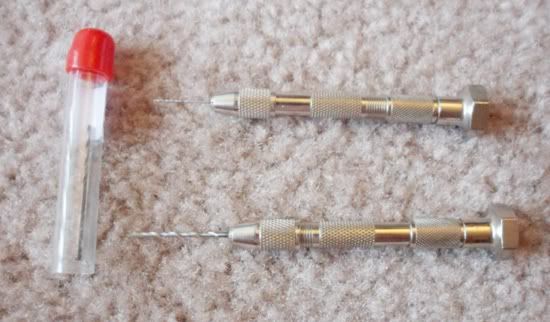 |
| This is an example of a pin vice; the little tip at the end is called the drill bit. |
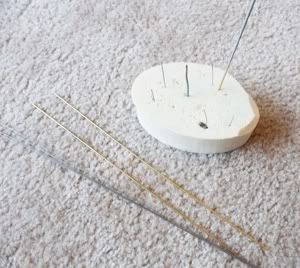 |
| This is wire and a foam cushion I use to hold my painted and primed pieces up. You will likely need something to keep your painted pieces on. Blocks of foam or any other thing you can stick wire into works. |
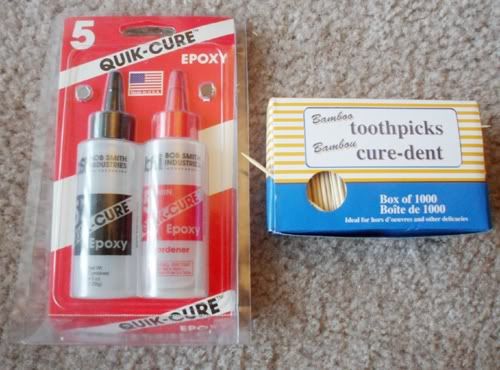
5) Putty
Putty is one of those things modelers love and hate at the same time. Puttying is often a tedious process and difficult to work with but its effects are very noticable. Putty is used to correct "gaps" in joints (to make them look seamless), to fill up little bubbles that popped during the casting process and to correct any problems in the sculpt. There are tons of different putties (ex. Milliput, Mr. Hobby, Tamiya, etc.) but my favorites are the Tamiya brand and Apoxie Sculpt. You can thin putty with a solvent to help it reach small cracks but I've never tried it. Putty should also be applied in thin layers; if it's too thick, it won't dry as fast. I usually use a toothpick when applying globs of putty.
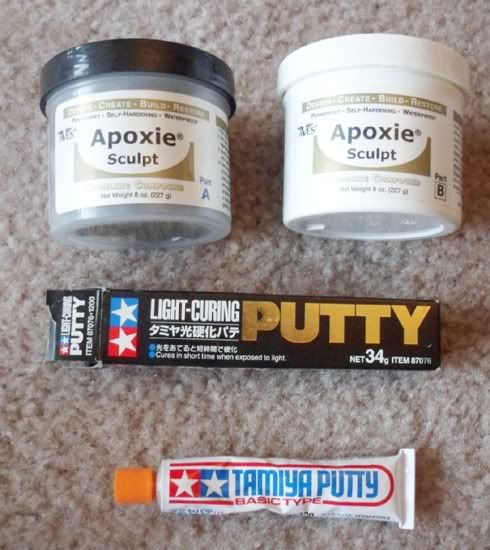
My three must-have putties:
Tamiya Putty Basic Type is a general grey putty used for correcting small problems in kits. It's useful for filling in gaps and bubbles. After you apply it you should let it sit for a few hours depending on how thick it was applied.
Tamiya Light-Curing Putty is my absolute favorite putty in the world lol. This putty is a mustard yellow color and when exposed under florescent or incandescent light it cures in a few minutes. This putty is not cheap (around $12-$20 per tube) but it lasts a long time so I feel it's a great deal for what you get. I literally use this stuff all the time and it's awesome for filling in small bubbles. I don't recommend using this putty for filling in gaps because it's very gooey and kind of hard to work with. Always keep it in a dark place and in its package. It also comes with a little black bag to prevent light from entering it.
Apoxie Sculpt is a denser two-part putty used for sculpting and filling in large areas. I use this when I have big gaps to fill or want to sculpt new parts. To use a two-part epoxy you take equal amounts of each putty compound and mix them together. For this particular putty you have a working time of 2-3 hours. It can be quite gooey at first so I recommend you wait 15-20 minutes before you start sculpting with it. This stuff also expires in about a year so don't buy too much at first!
6) Masking Tape
Masking tape is used to 'mask' the kit when you're painting. It is cut and applied directly to certain places where you don't want paint to go. Examples of this are masking the face when you're painting eyes, for fine details or areas with a lot of lines. In this case the only brand I recommend is Tamiya; it is designed for models and sticks particularly well to kits.
7) Primer
Primer is another very important step for your kit. Primer helps paint stick to the kit because it provides a surface for it to grip to. Although there are some painting methods that do not use primer (ex. the "clear-skin method" that makes it look like PVC) for beginners I highly recommend it. Many hobby primers are moderately expensive ($6-8 for a small can) so sandable automotive primers and general craft store primers are a more affordable option (you also get more). I use the spray can kind but companies like Mr. Hobby also make primer that you can use in an airbrush. The spray area for these cans is rather large so the can empties pretty quickly. Always try to primer in thin layers and spray about 8-10in. away.
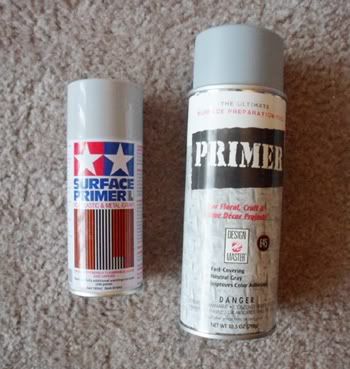 |
| Shown is Tamiya Surface Primer and Design Master's Primer. You can see the difference in size but they both cost the same! |
8) Paint
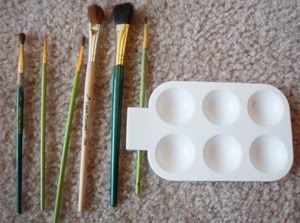
This is some peoples' favorite part and others dread it. Paint can be very finicky and it can either work for you or against you. If you are going to hand brush your kits I highly recommend you purchase some sturdy, durable brushes. Do NOT buy cheap brushes, in this case low cost = low quality. When a brush is low quality the little hairs tend to fall off and if this gets into your paint when you mix it it's a real mess. Then you have to try to pick the hairs out of the paint or if it's already on the kit it messes it up...brush hairs in paint are just a terrible experience lol. So buy good ones!
 In this hobby there are three main paint types; lacquer, enamel, and acrylic. Lacquer and enamel are primarily used with airbrushes so I won't cover them too much here. If you want a really professional looking kit though most sculptors use those types. In my case I use acrylic. Acrylic paint is water-based and comes in a huge variety of colors. There are quite a few brands such as FolkArt, Delta Ceramcoat, Apple Barrel, etc. These are available in any craft store and are usually the cheapest option. They're also convenient because there's so many colors. The pigment is not as strong in these paints as the other ones so when you paint you have to apply more coats. When you paint with these paints, ALWAYS thin your paint to a milky consistency with water or Windex. If you don't thin your paint it will come out looking streaky, uneven, and thick. Windex works surprisingly well for thinning paint and it doesn't leave the paint with a blue tint either.
It's also very important to keep in mind what paints you are using and what you put on top of one another. NEVER EVER put lacquer paint on top of acrylic or enamel, it will "eat" the paint away and screw up your entire kit. Enamel will tend to "eat" acrylic and acrylic will not "eat" anything.
So in general in order of "eating" it goes:
Lacquer: Do not put on top of enamel or acrylic
Enamel: Do not put on top of acrylic
Acrylic: Safe to put on both lacquer and enamel if COMPLETELY cured.
I didn't have a picture for this but I also use thin felt-tip markers for drawing eyeliner and eyelashes on kits. Some people prefer to use a really thin brush and black paint but I have an unsteady hand so it always messes up. Be sure to seal your kit before you try doing this though or it will mess up and stain your paint job. Try to get it as accurate as possible as well because it can still leave a faint black mark if you wipe it off with Windex.
8) Glue
Glue is another one of those items you should really, really have. Pinning and glue go together like peanut butter and jelly; you really need to have both of them together for maximum impact. I do not recommend Cyanoacrylate (CA) superglue (that runny kind that comes in a small jar like Elmers, Gorilla Glue, Zap-a-Gap, etc.). I used this kind when I was first starting my kits and it makes a huge mess and messes up your kit. If you get it on your hand and touch your kit you're also pretty screwed. They do make debonder for super glue but I just prefer to avoid everything related to CA superglue.
Instead I use something called a two-part epoxy glue. This glue comes in two parts that you mix on a small piece of cardboard with a toothpick or other disposable surface. It's much thicker than CA glue so you can apply it precisely where you need it. It comes in different curing times like 5min., 30min., and an hour...I prefer the 5min. one because I don't want to hold my kit forever :p
 |
| This stuff also lasts forever; I think I've had this glue for more than two years. |
9) Sealer
No matter how good your paint job is you can potentially ruin it by not sealing your kit. Sealant (or a top coat) is used to protect your kit from dirt and scratches. It can also be used to make certain parts shiny (like a plugsuit) and other parts matte (like hair and skin). Just like primer, there are lots of different sealers with different effects. It's up to you to experiment to see what works best. I recommend you test it on a small area at first as well; some sealers claim to be matte but actually have a slightly satin finish. Be careful and pay attention to what type of sealer you use; some are intended for lacquer paints and others for enamel. The paint section has details on this. In general though if you want your kit to be protected and last for a long time you need to apply a top coat.
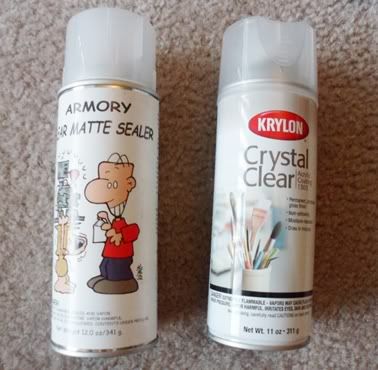 |
| Two common brands of sealer; first is available in some hobby stores, Krylon just about everywhere. |
----------------------------------------------------------------------------------------------------------------------------------------------------------
WOW, that's a lot of information! If this sounds like it's too much to handle it's really not that bad. Building a kit is a process of steps and although it takes some work it's very rewarding.
Next time I will cover sanding a kit and possibly pinning and bathing it. I think I will be using this Len kit from Melty Blood. She has 14 parts but most are pretty straightforward. Because she's large it'll also be easy to tell what I'm doing lol.
Thank you for taking the time to read this! See you next time! (^▽^)/
No comments:
Post a Comment