
This blog post has also been crossposted over on my account on MFC here.

Hello everyone and thanks for reading my blog! Today I will be continuing my series of posts on how to assemble and display a garage kit. The previous post about supplies can be located here. I swore to myself I'd get this post out before school started so I'm glad I could finish it.
I really dislike prepping a kit; it's tedious and sometimes more work than it's worth. It's also boring to look at in photos since there's basically just a 'before' and 'after' photo lol. Hopefully this post will help clear up some confusion about the prepping process. If you want larger pics or are having trouble seeing the details just right click and open the image in a new tab :)
Part 1 is located here: Supplies and Background
-------------------------------------------------------------------------------------------------------------------------------------------------------------
Whether you've purchased an original kit or a resin recast the box/plastic container will look unique. Original kits usually come with a box of some sort as well as an instruction sheet or paper. Some also have stickers on them certifying they are directly from Wonder Festival or a licensed provider. Recasts come in plastic containers or boxes with the company logo on them and occasionally contain a scanned picture of the instructions.
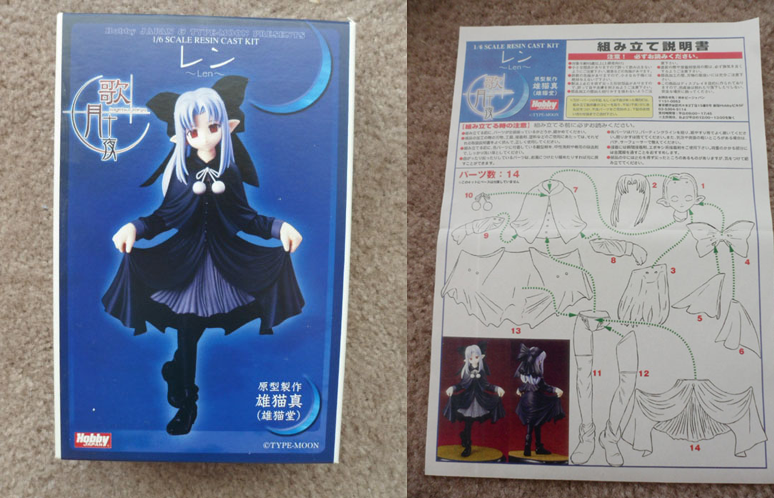 |
| This is an original Hobby Japan box. On the right is the instruction sheet. |
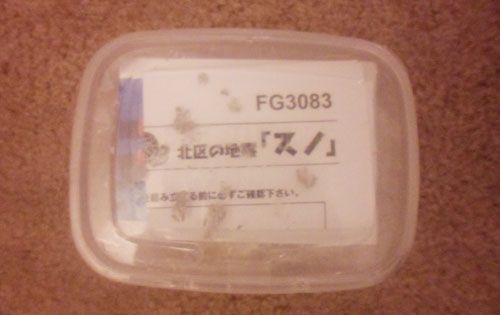 |
| This is a resin recast with primer stains. |
 |
| This is an authentic box (notice holographic sticker) |
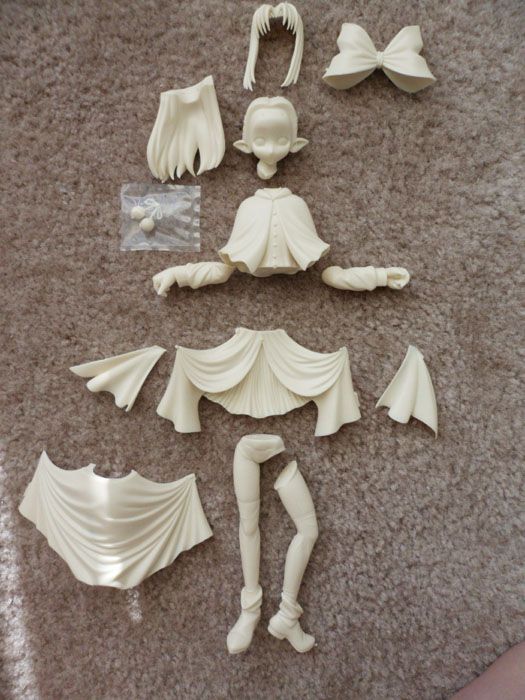
Before you start sanding your kit down and inspecting it you MUST lay out all of the parts and count them! If your resin kit comes with a diagram that's even better; cross off each part and make sure they're all there. If you own an original kit you're pretty much out of luck if you are missing parts. However, if you purchased a recast then you have a right to email the company and demand a replacement part. I remember when I purchased recasts I bought one and they gave me two left arm parts. The earlier you check the better; I waited three months and was lucky I even received another part.
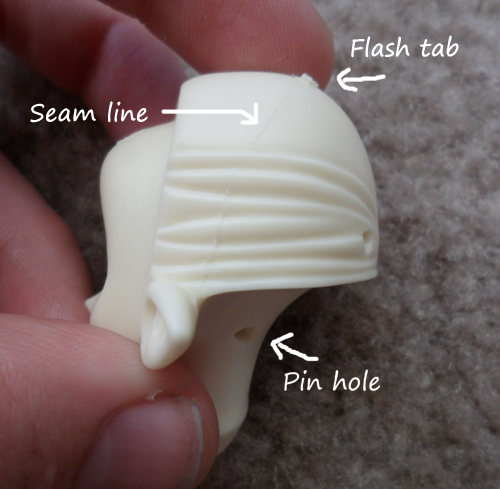
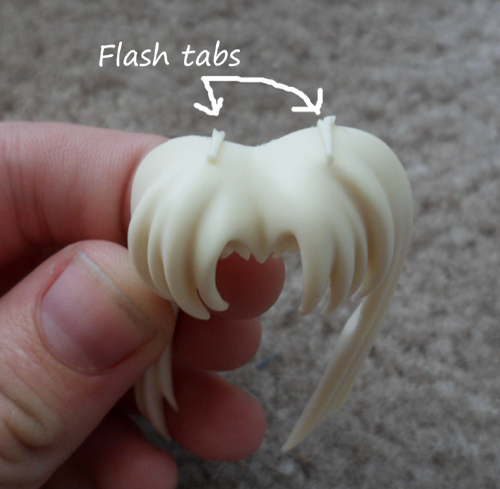
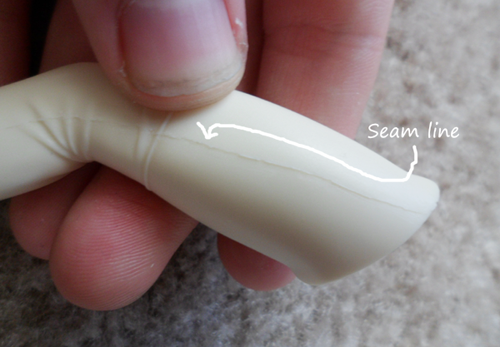
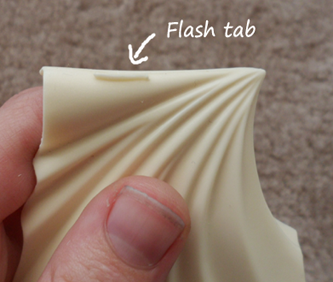
Okay, so you look closer. Upon inspecting your parts to your horror you discover it's covered with lines and bumpy pieces. Σ(゜ロ゜;) What the heck is that mess?! PVC doesn't look that bad! Why the hell did I decide to buy this!?
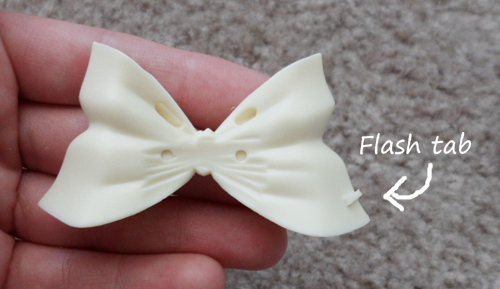
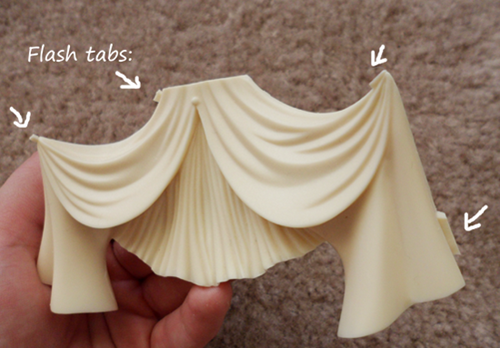
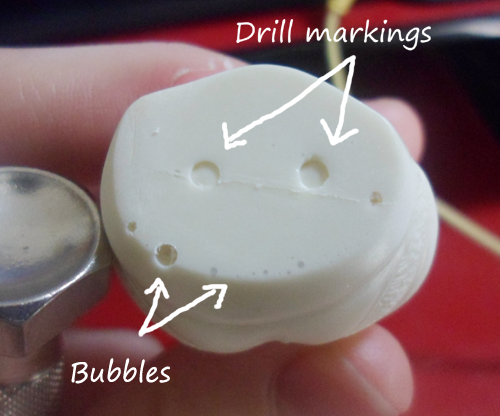
Those clumps and lines are called flash tabs and seamlines. These defects are left over from the casting process sculptors and companies use after sticking resin in a mold. If molds are not perfectly aligned, liquid resin will seep in the cracks and that builds a ridge. Tabs are also part of the casting process. Your resin kit may also appear to have little dots or bumps in places. Those are bubbles that erupted during casting and they must be filled with putty in order to make your kit look smooth. Smaller bubbles usually cannot be seen until you primer your kit but large bubbles are very noticeable.

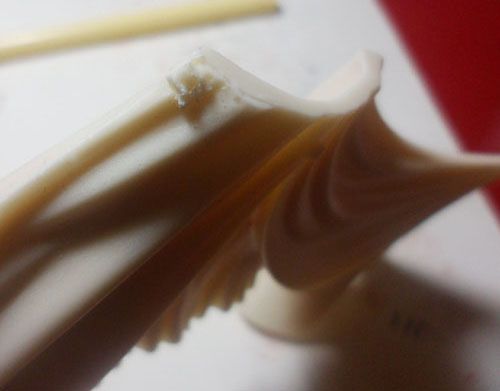
The first thing I usually do is cut off large resin tabs with an X-acto knife or with my wire clippers. It's pointless to try to sand down large tabs that aren't even going to be on the kit anyway and you can always sand down the area after you cut it. If you're worried about whether or not what you're looking at is a tab I implore you to look at finished products or the parts list. If you don't see the tab you can usually cut it off. Even if you do make a mistake you can always use putty and sculpt new parts, that's the beauty of this hobby :p
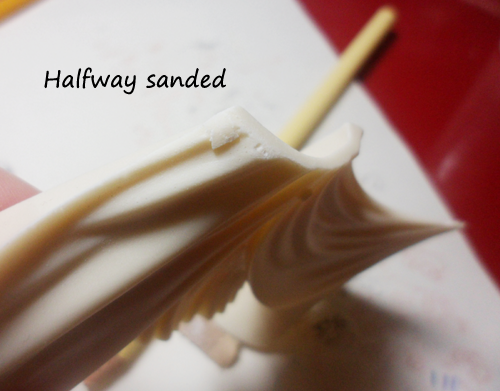 In my previous blog post I explained how the grit number of sandpaper works. For basic preparation and removal of seam lines I use 200 and 400 grit paper. This stuff is heavy-duty and literally tears the resin off but as a trade-off it usually ends up scratching your kit. If you are afraid of scratching your kit so deep primer or putty will not fill it, then I suggest a higher grit in the 400-600 range. It may also be useful if you're airbrushing or using the clear-skin method (more on that later) and need a soft, smooth surface. The only problem with this is that it may take a while to sand, your hand will get tired, etc. I'm lazy so I end up using lower grits and it's worked fine for me so far.
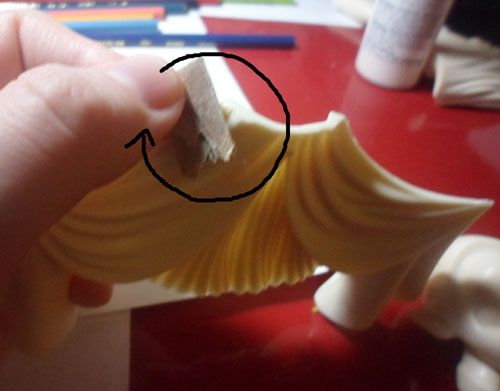 Take your piece and firmly rub the sandpaper against a seam line or flash tab in a circular motion. If you just move the sandpaper up and down you risk oversanding or damaging other areas. It is MUCH easier to fix small problems than it is to oversand and have to putty everything to try to build up mass again. The only time I end up sanding back and forth is when there are seam lines in places with natural bumps like hair and fingers.
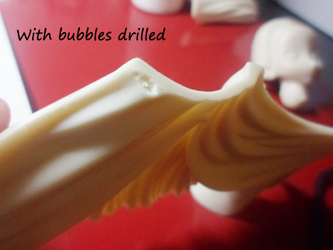
You may notice when sanding that there are little bubbles that don't seem to go away. Don't try to sand these down, you risk oversanding. What I usually do is take my pin vice and drill a nice hole into the resin. This eliminates the bubble and creates a space where you can fill the kit with putty later. I try to do this as soon as I see a spot so I won't forget it later.
This process takes me several hours since I sand everything by hand and it depends on the complexity of the kit as well. There are tools you can use which speed up the process such as a Dremel but you also risk oversanding so it's usually better to sand delicate parts by hand. At this point it does NOT have to look perfect! You will be priming your kit later to locate additional things to fix like air bubbles and defects. I've also learned to not bother with defects you won't end up seeing anyway :p
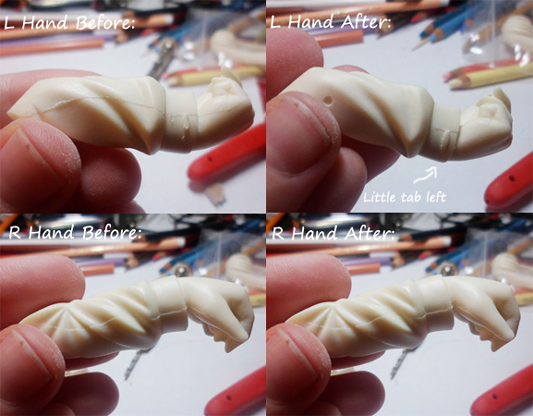
Two more random photos that have to be smaller to fit the format I like:

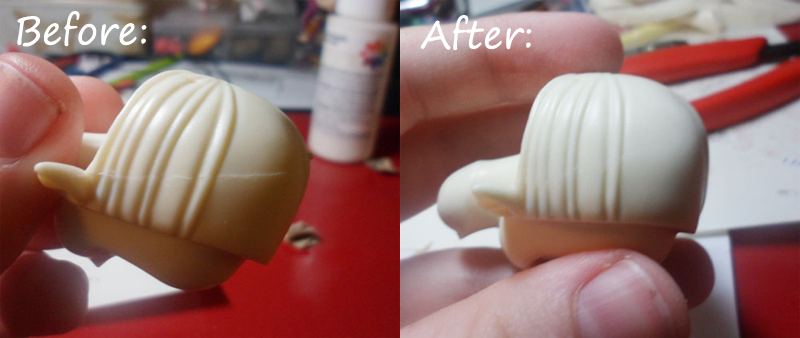
Here are some more before and after pictures of sanding various pieces.

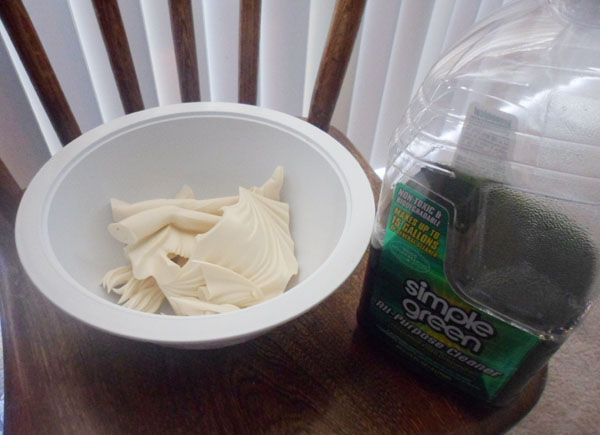
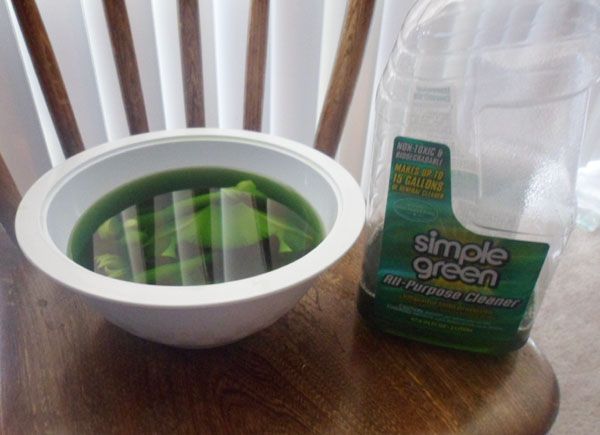
After you've finished sanding down your parts you need to soak them in a cleaner to remove all the resin particles and mold release. Mold release is left over from the casting process and if it's not removed afterwards it makes primer and paint difficult to adhere to the surface of the resin. I use undiluted Simple Green cleaner and leave the resin it for at most 24 hours. Don't leave the resin in too long; I did that once and after three days the part became soft and flexible >_>. I usually wait around 6-7 hours and then begin to wash it off.
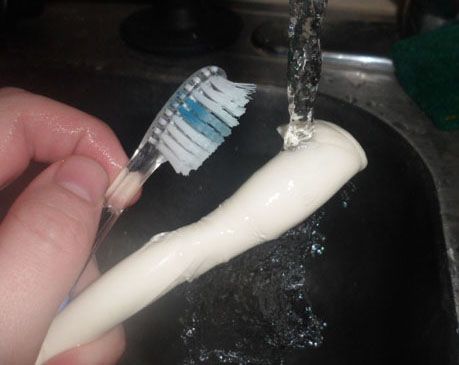
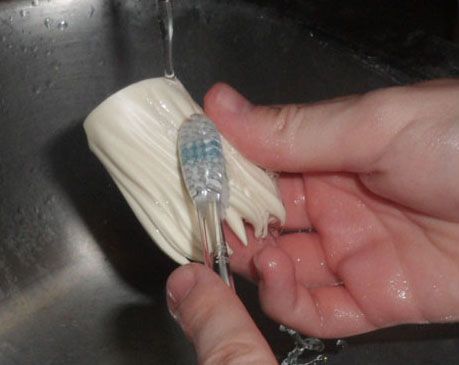
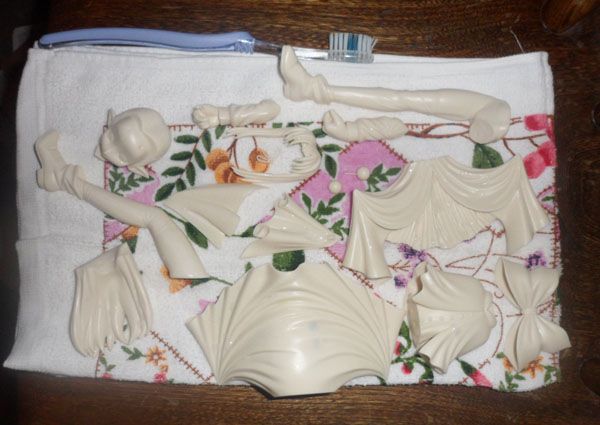
When your parts have gotten a nice soaking in the cleaner, take soft-bristled toothbrush and scrub each part all over with cold, running water. This will wash away any leftover mold release. Place each part on a dry towel and let air dry. You can also pour the cleaner back into its original bottle and use it multiple times which saves a lot of money in the long run.
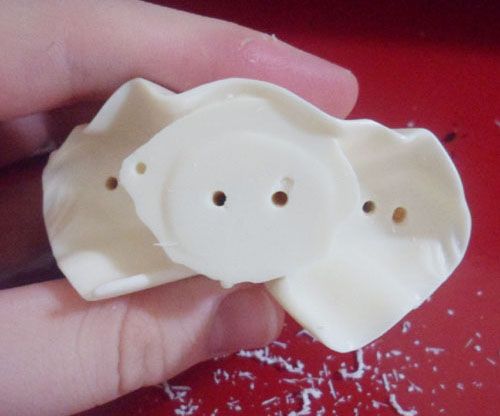
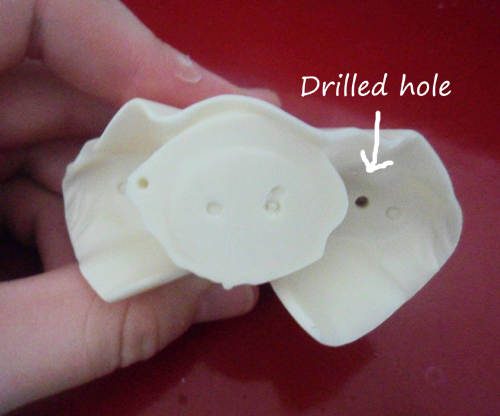
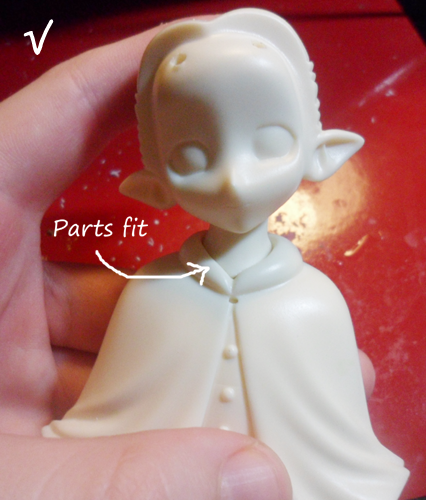
 Now that your parts are nice and clean, it's time to begin pinning and test-fitting the pieces. Some people like to pin first, then wash and I can see why they do it because when you handle your kit a lot it gets dirty again...so it's really up to you :p. In my previous photos you may have noticed that some parts have little holes in certain areas that aren't air bubbles and that I didn't drill. Some resin kits have guidelines on where to drill in the pins. This is the easy way because the holes are already matched up. If your kit does not have guidelines in it you will need to estimate where to drill each hole to ensure a good fit. Some people prefer to blindly drill, some mark the spaces with a marker or paint and others drill through sideways or through the piece completely and then putty the holes they've made. This part is kind of difficult and takes some time getting used to. My advice is to go at a steady pace and check constantly with a wire (I will use wire and pin interchangeably).
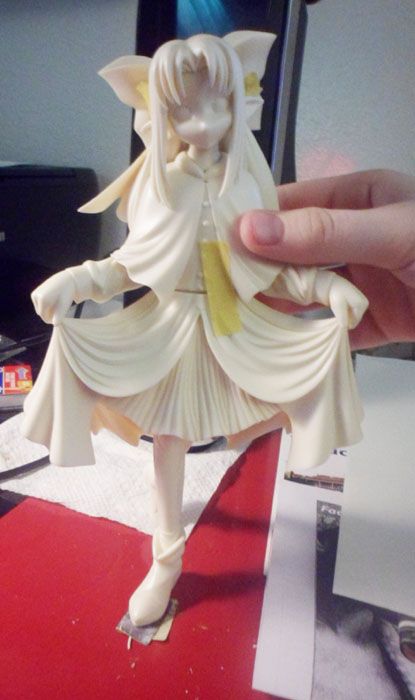
I generally mark the place I want to drill and turn the pin vice at a constant speed into the part. Make sure you are drilling straight into the resin and not at an angle. If you have delicate pieces you should not bend them too hard or drill all the way through the piece. If you do break or drill through a piece, you will need to fix it with putty or glue (I will cover that in the next blog post). Take your wire cutters and clip your pins to an appropriate size after you've finished drilling. Stick them into your resin kit and make sure both pieces fit firmly together. If you ended up drilling at an angle you may need to bend the wire accordingly.

Some pieces can also be fixed with wire. I broke this really delicate piece of resin when I was sanding it down. :c Luckily, I had some wire that looked very similar to the thin resin pieces. I decided to substitute it by drilling in both sides of the broken pieces. After the piece is primed and prepped more it will look fine!

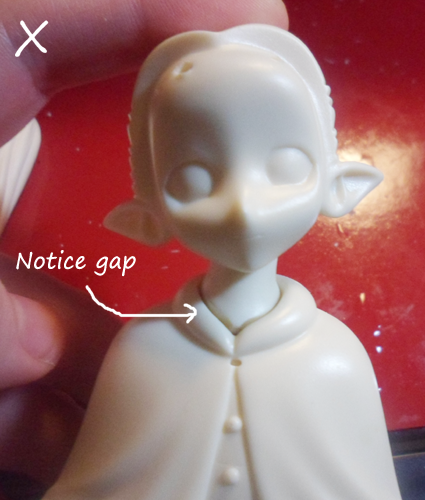
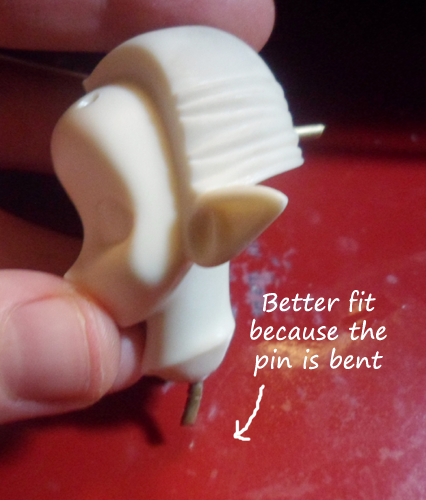
Some parts may not fit together perfectly and you may notice little gaps. If you remove the pin and put the two pieces together with your hands and it looks fine, your pins:
- May be at the wrong angle, try bending them
- The pin is too long, try cutting a little bit of the wire off
- The two drill holes do not match up; you will need to drill in another spot or fill the gap with putty and try again
No comments:
Post a Comment