Showing posts with label figurine. Show all posts

Friday, November 11, 2016

Nonscale Fairy - Original Character

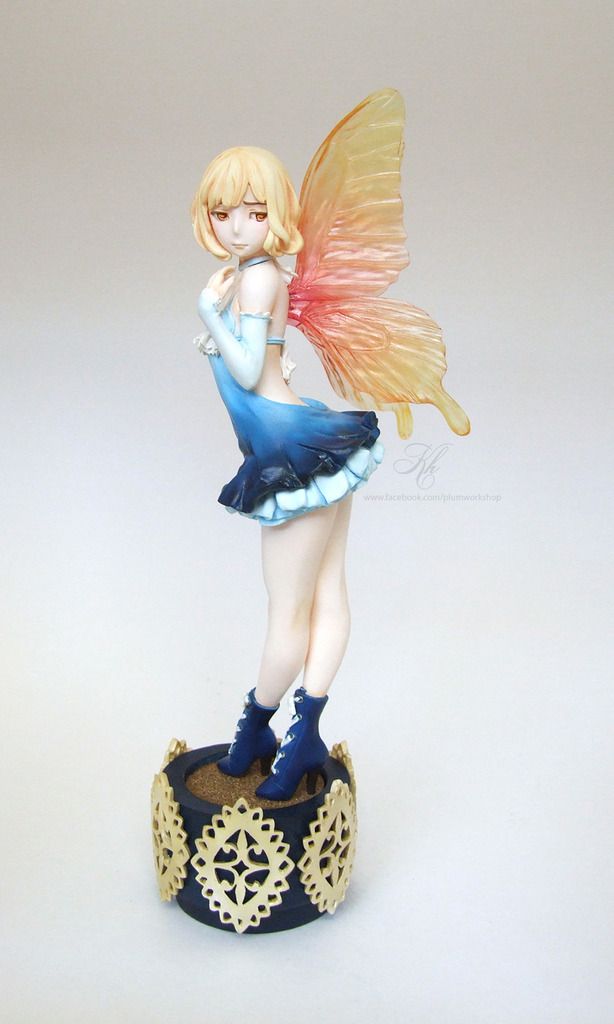
Hi everyone! :) Long time no post. Today I’d like to share my 12th finished work.

This little Fairy is by Meikyuu no Koe. Unfortunately this kit is extremely rare and I don’t even know if this circle sculpts anymore (most of her kits were made 2011-2012) so my copy is a recast. However, I hope that my paintjob shows how beautiful her sculpt is – this is truly one of my favorite kits in my collection and it took me a long time to build up the courage to paint her.

When I think of fairies I usually think of pale, pastel creatures and that’s how I was initially planning to paint this little gal. However, I always like to challenge myself when building kits and paint something that looks completely different from other artists’ work. I decided to settle on a fairy that represents a sunset.

If you haven't done so already please take a look at my Facebook page! I update it more regularly than here, this blog has become more of a place to keep a catalog of my finished works. Plum Workshop


Sunday, November 1, 2015

Nonscale Little Bride - Original Character

Good morning/afternoon/evening everyone!

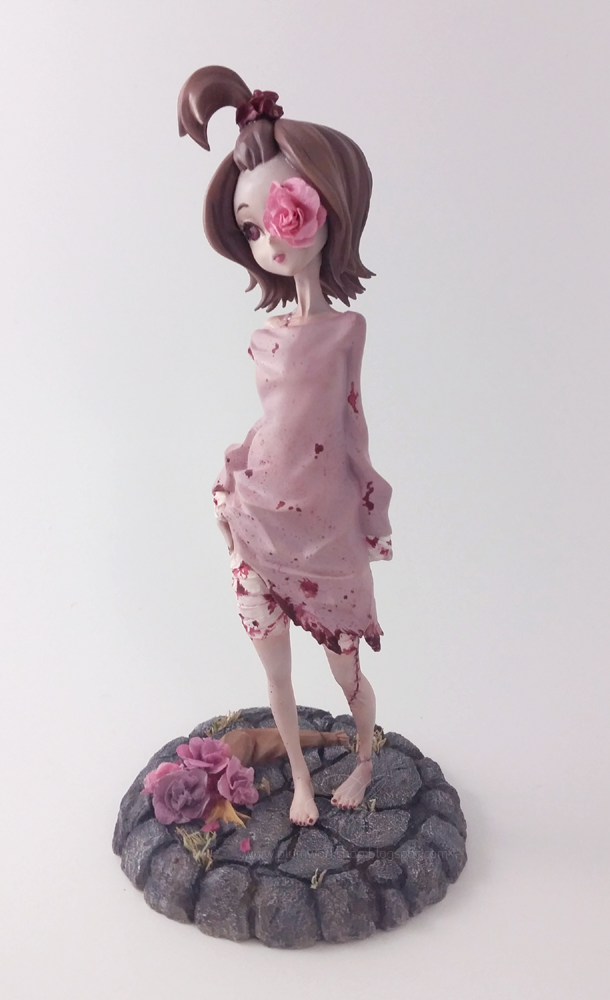
Although it is no longer Halloween I hope everyone had a safe and spooky time. I didn't end up doing that much since I wanted to see if we received any trick-or-treaters but it was an abysmal failure since only 3 showed up. I also left the candy bowl outside in case anyone stopped by and some kid stole the entire candy bowl so that was disappointing lol...anyway I managed to finish this kit last night but there were quite a few people who finished kits on Halloween so I decided to hold off on posting. Photo editing also took me a while >_<

Oh also I would like to announce that I finally created a Facebook page for my work. When I'm working on kits I will be posting more WIP photos on there since it's easier so if you enjoy looking at my work I would really appreciate a like on the page. Thank you so much. Here is the link to my Facebook.

Sunday, September 6, 2015

Busy Bee Life and New Kits

Hello everyone, long time no post! I've been very inactive on this blog lately due to a combination of life and venturing out into the real world ^^ I don't want to bore anyone with the details but in short the past few months I've been enjoying gainful employment, moved into a house, and have been doing a bit of travelling (PAX Prime anyone?) so I haven't had much time to sit down and focus on my kits.

This is partially my fault since I now have no work space...the desk I've been using to build stuff on is actually my computer desk but now that we have a dedicated computer room I don't want to haul all my paints and stuff across the house and get everything covered in resin. >_> Hopefully in the next few weeks I'll be able to acquire a desk so I can sit down and focus on kits. This hasn't stopped me from purchasing a number of items though - I still enjoy hoarding and collecting resin when I feel like spoiling myself :p If it isn't clothing or cosmetics (another more recent obsession) it's garage kits hehe.

With that said I just wanted to show off a couple of recent purchases I've made since I've been wanting to gush about them for a while but I don't want to bother anyone. Silly me didn't realize that I could rant on my own blog!

Habenero-tan set by Midass


This was a complete impulse purchase I made on Mandarake back in May. I have no idea why I decide to buy this kit because I'm not familiar with Habenero-tan besides the fact that she's a mascot and likes to sit on a toilet (because it has to do with spicy food I guess???) but I couldn't pass it up for 2,000 yen. The coolest part is that this kit came with an original 4koma and post card. I'm pretty sure the post card is signed by the creator of Habenero-tan but it might also be printed on...either way the quality of the paper is really high quality and it's a pretty cool freebie. I did a ton of hunting on Midass but it appears this is either the only kit or one of very few kits they created so maybe they were just an unfortunate company that flopped. The kit is super straight forward and they're both very small so when/if I build this set I'll be sure to take a bunch of photos of all the bonus goodies.


Hagoromo-chan by Kilohana
AHHHHHHHHHHHH!!! This kit is an absolutely dream of mine to own and I legitimately freaked out when I found this one for sale. A fellow GK acquaintance CinnamonSwirls recently decided to cut down on her kits and put this original one up for sale and I was lucky enough to see it and snatch her up. I have a very soft spot for small fantasy kits involving skinny/ethereal fairies and this figure is everything that I love all wrapped up into one convenient resin package. The level of detail is perfect for someone like me. To give you an example the flower on the top of her head has these little anthers (see pic to the right)...every single one of those anthers needs to be glued on separately and painted onto the flower petal base. You also can't really tell in the picture but she comes with a bunch of clear parts too! The snail, cherries, wings, little shoes, hair and a couple of other pieces are made of clear resin which adds a very interesting contrast to the rest of the kit. I've never painted clear parts before so I'll most likely have to bring out my airbrush for those. I could rant about this kit a lot because I'm so excited it's in my possession but again that will have to wait until I'm actually building it lol.

Little Bride by Munchkin

Forewarning: This kit is a recast. If you're not OK with that please just skip this little section since I'm not about to discuss the ethics of selling recasts on my blog atm. I really wanted this kit immediately since Halloween is coming up and I want an excuse to paint something a little spookier (not that this is spooky...at all...). After my Mage kit I want to do something darker and a little bloodier and I've been eyeing her since I've seen so many beautiful versions of this kit. She's so versatile too! You can paint her to look more like a normal little girl or go completely Monster High and use all sorts of colors like greens and purples ^^ Every single build I've seen of her looks completely different and unique which isn't something you see too often. She doesn't have very many parts and is pretty small (~15cm fully built) so I'm hoping for a quick and relatively painless build. I have no idea what kind of color scheme to give her though...this will be my next kit though so expect to see a lot more of her soon.


That's all I have for now so thanks for reading ^^ I hope to post a lot more soon.

Tuesday, May 12, 2015

Nonscale Mage - 7th Dragon

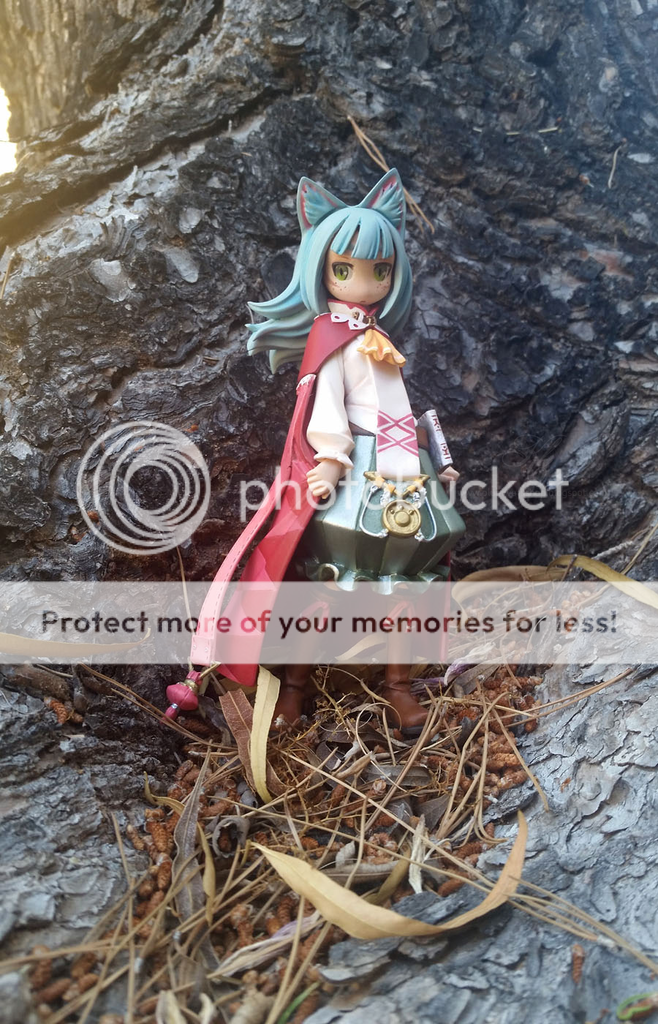
I finally hit the double digits! This little mage (a representation of my character Milandia in FFXIV) by Utsunekotei is my 10th kit. It's hard to believe how far I've come since my first build and to be honest I'm quite proud of this one. As always everything is hand-painted with craft acrylic paint and is shaded with Mungyo pastels.


Sunday, May 10, 2015

Painting Eyes: A Quick Walkthrough

You know those times when you get so ambitious on a project you end up doing way more than is necessary? That is definitely me with this garage kit right now. Because I'm feeling slightly insane and want to put off the nervousness from starting my job on Monday I decided to create a little WIP on how I paint eyes. I know I did one before in my GK Compendium series but it's always fun to take a bunch of photos and see everything step-by-step. So for those who are seasoned pros and curious or for those who are just scared of hand-painting eyes this is for you!

*Note: These eyes are approximately 0.5cm in height and length. You CAN paint those tiny eyes as long as you have thin paintbrushes ;)

I started out by painting the schlera a nice off-white. I'm a huge fan of the acrylic paint "Seashell White" by Delta Ceramcoat and use it for pretty much everything since regular white paint is a little too bright for me. Make an outline in pencil where you want to paint your iris and make sure they are facing the same direction.
Paint the lightest color of your eye in thin coats. The consistency of your paint is very important here. If it's too runny paint will run all over your eyeball but if it's too thick you'll end up with streaky lines. Try to stay within the lines you created with pencil. Make sure both eyes have around the same size iris or you'll get a weird looking crazy eye lol.

Apply the next color onto your eye. It's up to you how you do this but generally try to paint one to two shades darker on top of your lightest color - this will ensure that the contrast on your eye isn't too striking (in a bad way lol). I like to paint in a U-shape that ends around halfway on the eyeball.

The next few steps can be done in any order and I've mixed it up before so it just depends on your mood. ^^ In this case I decided to paint her eyelashes. On some kits you're lucky and the eyelids are already sculpted for you but sometimes you have to paint onto a flat surface. The key to painting eyelashes is sharp lines - notice how the ends of my eyelashes are very pointy. There are thousands of different eye styles but almost all of them have an angle somewhere in there. Get confident with painting angles! At this point I also added an upper eye crease with a 0.005 brown micron pen.

Oh also you can paint the eyelashes whatever color you want, it depends on the colors of your kit I guess. I usually paint my eyelashes black but in this case it was way too harsh so I mixed two different colors of brown together (it's still pretty dark though haha).

Not much has changed in this step except I decided to outline her eye with a 0.05mm mechanical pencil.

Lastly I added the classic anime eye shine (white dot) and her pupil. This also varies from character to character but I was going for more of a striking cat eye slit.

And here's another tiny thing I did just to show you how much of a difference a simple change in lines can entirely change the kit's appearance. Notice how the iris in the picture above is rounded compared to the picture below where the iris is pointed at the ends. Feels more like a feline, right?

I also added her markings and shaded a little bit above on her eyelid.

At this point I had already finished my kit but did a couple of other things like making her freckles a little larger and adding some more shading on her face. You can't see it in this photo but I also added Pledge Future FloorCare to her eyes to make them super shiny. I did this on my Nostradamus kit as well and it really makes them stand out ^^

EH CLOSE ENOUGH. I just realized how blue my kit's hair looks though...I didn't even use blue idk how that happened LOL

There are countless ways you can paint your eyes whether it's changing the color of the iris, the shape of the eyelashes or where you put that classic anime shine. I find it helpful to experiment with different eye types by drawing them on paper as well. I generally add two to three colors on my eyes to create a gradient but it depends how ambitious and/or comfortable you are with your kit. Also helpful is how big the eyes on your kit are - the bigger your eye generally the more detail you can add.

And also for the love of god PLEASE do not forget to paint eyebrows on your kit. I have an obsession thing for strong eyebrow game and every time I see a kit without eyebrows I silently weep for the poor character whose eyebrows were singed off in a horrible accident. 

Stay tuned tomorrow (well technically today now) for the finished product and thanks for reading ^^

Sunday, May 3, 2015

Third Time's the Charm

Hello friends, GK builders and everyone in-between! I realized it's been over a month already with no updates so I figured it's time for another post.

I haven't been completely lazy on the GK front as you'll see in a moment but I have been doing other stuff as well. As some of you probably know I graduated with a bachelor's degree back in December but what you might not have known was that I wasn't having much luck in the job front. I began volunteering last month for fun and had been applying for jobs pretty regularly online but nothing was coming from it. However thanks to networking I am happy to say that after a little over four months that has changed and in two weeks I'll be officially employed in a real job in my field! I am very lucky but just want to say to anyone looking for a job be professional, don't get discouraged, make those connections and use them to your advantage. Anyway having that job means that I will have less time online but hopefully I won't be too exhausted to do anything.

Because of this new situation I am giving myself a deadline to finish this Mage figure by next Sunday. I WILL DO IT! I'm pretty much almost done but her cape is giving me so much trouble -_- Here are some pics:
I like the somewhat messy worn-in leather look which is why the boots are kinda different colors
Her skirt thing is shiny!
Here's where the real trouble starts. So I initially didn't tape this cape at all and just went to town painting the squares a dark red. I didn't like it at all though and the red wouldn't go on evenly so I decided forget it! I'll strip the paint and try masking tape like a real builder cause I'm a pro
Hahaha bad idea :( The pink went on nicely but the red was ugly and parts of it were stripped off. Red is a really hard color to paint evenly! I also painted too many layers which screwed things up; it's kind of hard to explain but the more layers you paint the more paint gets built up so when you take off the masking tape you can sometimes be left with thick paint that doesn't match up with the rest of the areas you didn't mask (wow that made zero sense). Anyway I figured out that the deep red was not what I wanted at all a little too late. I wish I took a before picture but the pink I used for those little ribbon things looked even worse contrasting against these colors. Ughughgugh
SO I PRIMED IT AGAIN! Notice that you can still see the red in some spots and some areas are a little rough. I was too lazy to fix this since her cape is in the back anyway and you won't really be able to notice it unless you really look.
Paint in progress. I decided against the masking tape, I will deal with the excess paint somehow (probably Windex and a Q-tip lol). Instead of a deep red this time I think I'm just going to go with a deeper, redder pink but not quite burgundy.
More parts without shading or details which I think came out really cute. The pink looks sooooo much better than the dark red I wish I took more pictures. It especially goes well against her little orange collar and the greens of her skirt thing.

That's all the pictures I have now but I will try to take a couple more before I finish up this kit. I've got a lot of work to do on it this week since I have to finish painting all the parts, add details, add shading, glue it all together, build a small book for her to hold, and build a custom base. Most of those shouldn't be to hard and I am definitely up for the challenge now that I have a goal ^^

I just feel like I don't want today to end, have you ever had a day like that? Take care everyone.
Thursday, March 26, 2015

7th Dragon Mage Color Scheme

Hi everyone this is a quick update since I'm about to paint my Mage and wanted to share her color scheme!

So for my last kit (Nostradamus) I couldn't figure out which color scheme I wanted to use so I asked people on MFC for some advice. They were really helpful so I decided to try doing that again. Sooo I took a poll on a GK group I'm in and on MFC and the final results were pretty close overall...
I like sharing data so here's the results:
I was leaning toward 5 from the beginning but I'm surprised how many people liked the other choices as well. The results on the GK group were kind of similar but more people liked color scheme 4 which is interesting since that was not popular at all on MFC. I've taken statistics but I still find it very interesting how sets of data differ depending on what kind of crowd you ask.

Anyway I decided I liked color scheme 5 best (plus it reminds me of a raspberry). One of my friends said that adding in a 3rd major color was a good idea though so I messed with the colors a little and found one I'm pretty happy with. I also added in the markings on her face, lightened the gold details, etc. I will also change the base and will probably have her standing in a field with rocks or near a river or something since she is from a game. I'd like to get rid of that little orb and add a summoning book in its place but that depends how ambitious I'm feeling haha... overall I'm sure that my actual kit will differ a little bit but overall I want her to come out like this:
I think I mentioned in at least one earlier blog post how small this kit is but she is small so I'm not going to bother with the airbrush and will stick to hand-painting. For comparison:
~13cm or so not including her hair and ears
Yup these pieces are 1cm...
And that's the right side of my desk as I'm typing this. I'm not sure if I'll make any WIP posts since when I start painting I get really into it but maybe I'll try to do something for her eyes and the details on her outfit ^^ My next blog post should be this completed kit so until next time!