
Although it is no longer Halloween I hope everyone had a safe and spooky time. I didn't end up doing that much since I wanted to see if we received any trick-or-treaters but it was an abysmal failure since only 3 showed up. I also left the candy bowl outside in case anyone stopped by and some kid stole the entire candy bowl so that was disappointing lol...anyway I managed to finish this kit last night but there were quite a few people who finished kits on Halloween so I decided to hold off on posting. Photo editing also took me a while >_<
Oh also I would like to announce that I finally created a Facebook page for my work. When I'm working on kits I will be posting more WIP photos on there since it's easier so if you enjoy looking at my work I would really appreciate a like on the page. Thank you so much. Here is the link to my Facebook.
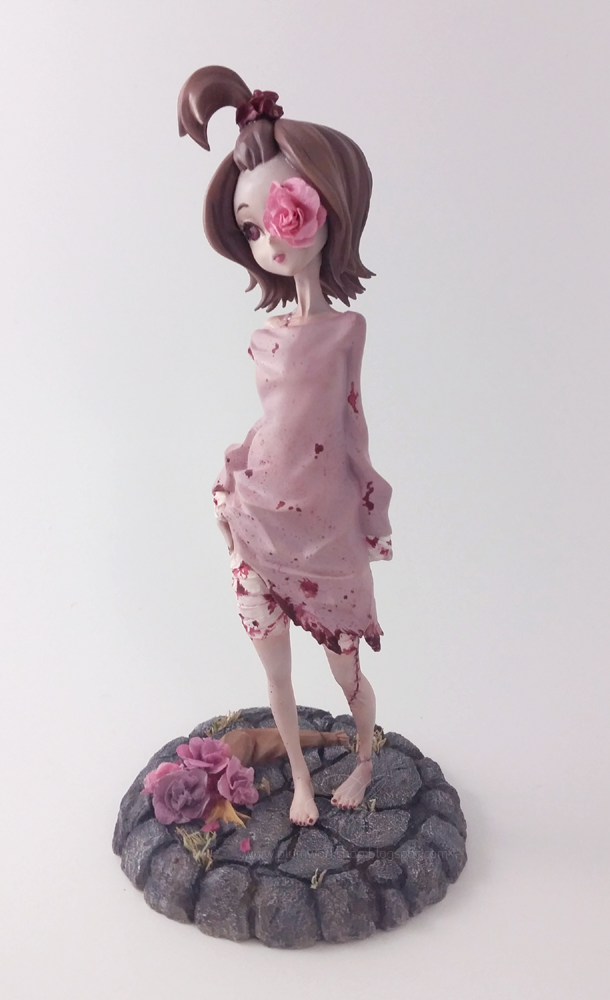

There are a number of new techniques and modifications I made this time since I wanted to test out some new skills. Among them:
- Airbrushing (more on that below)
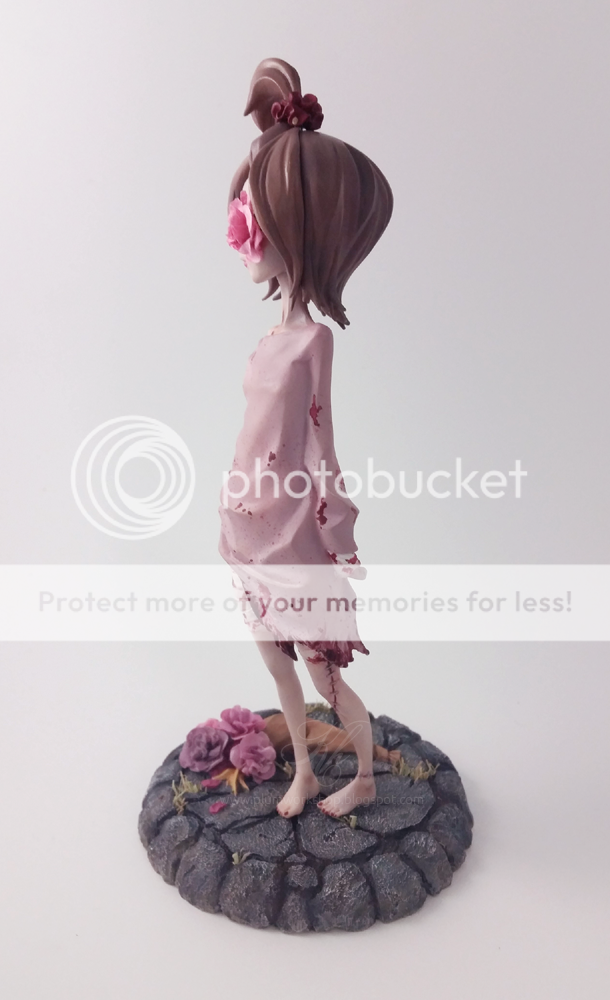
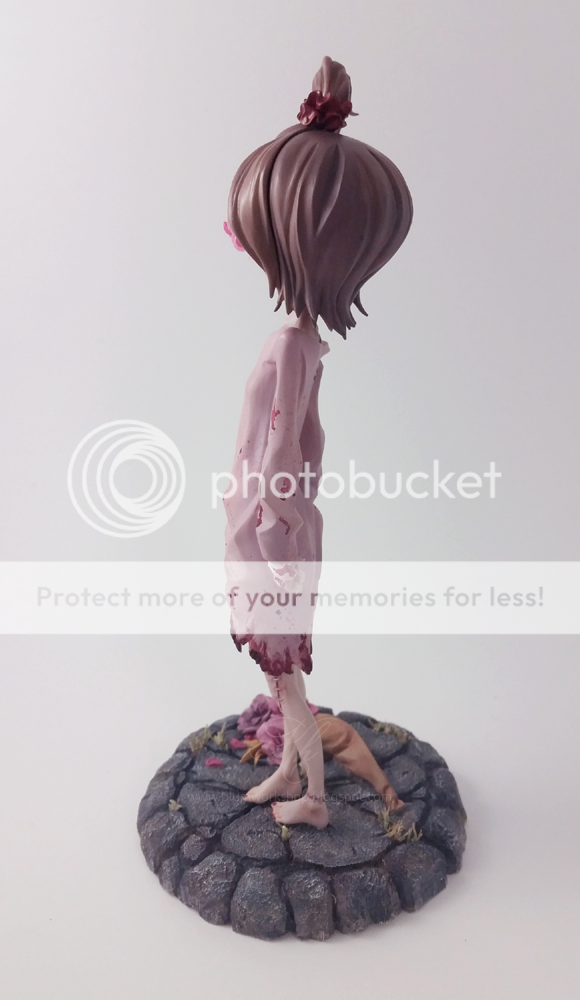
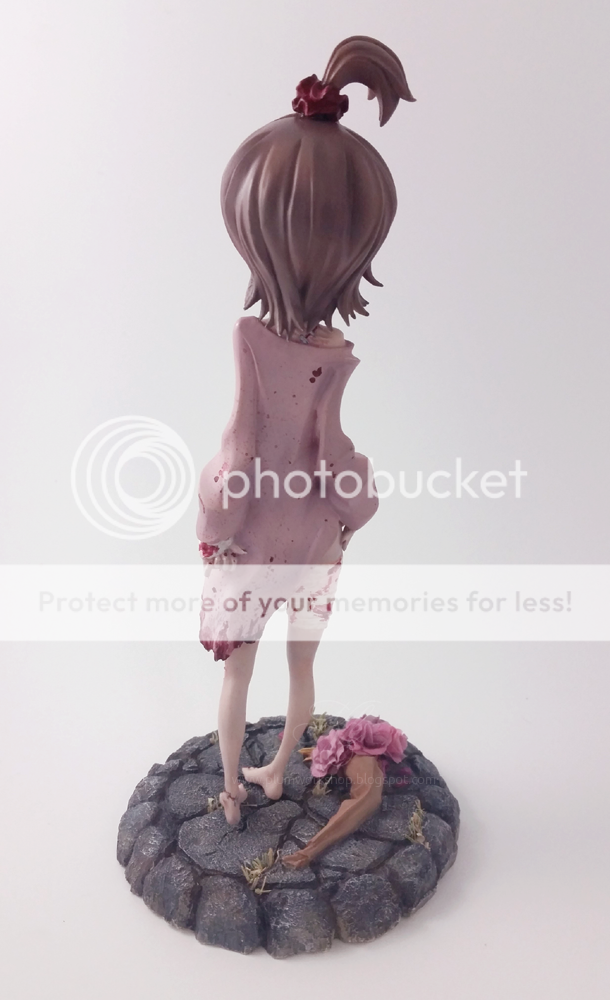
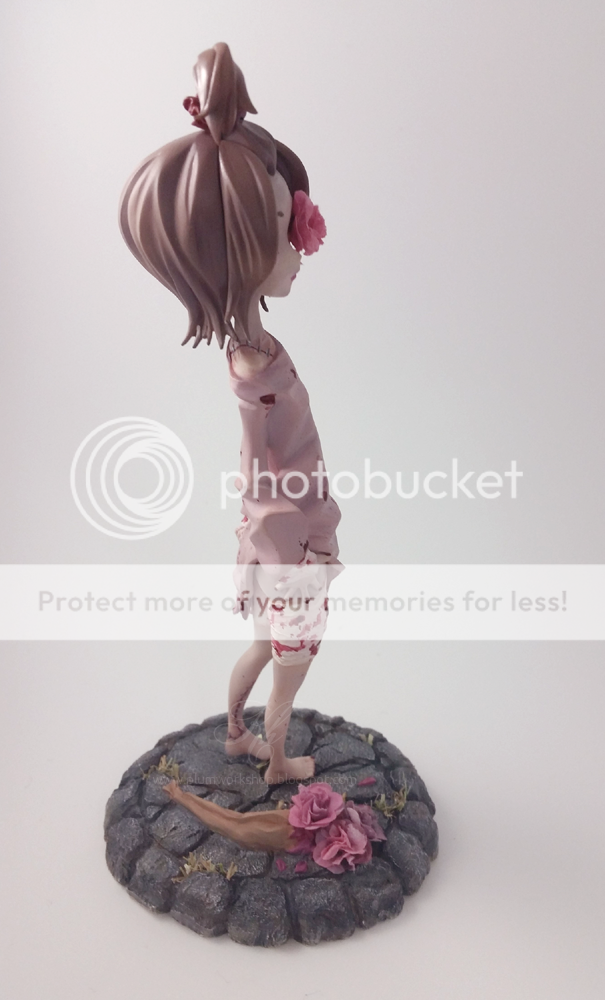
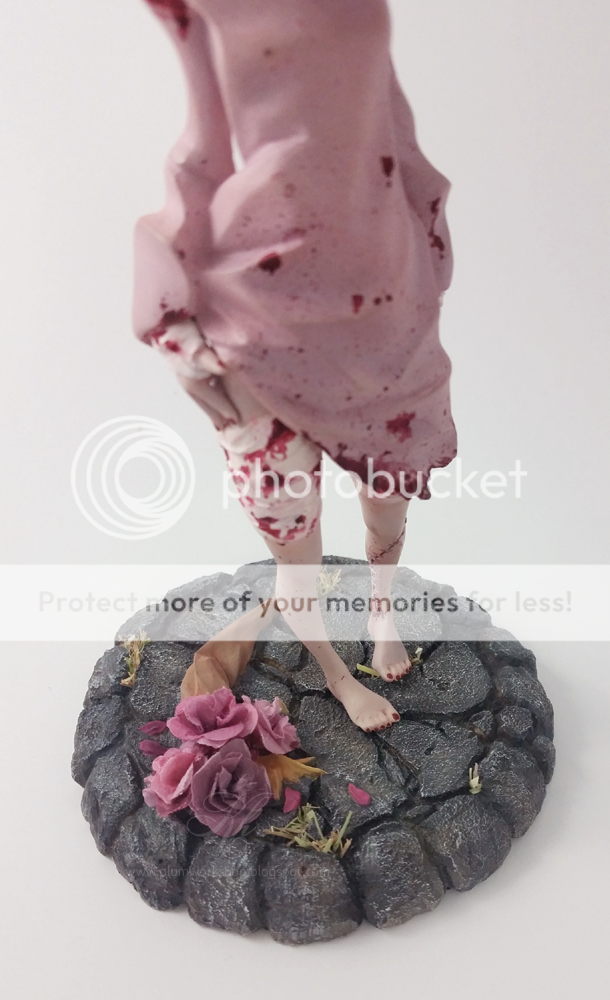
- Washing, Drybrushing, adding details to a base - I've never painted a textured base before and this was really fun. I kind of want to build a lot of miniature bases now hehe. The grass was a little bit of a pain though since I'm insane and decided to hand glue every single piece of grass into the cracks hahaha
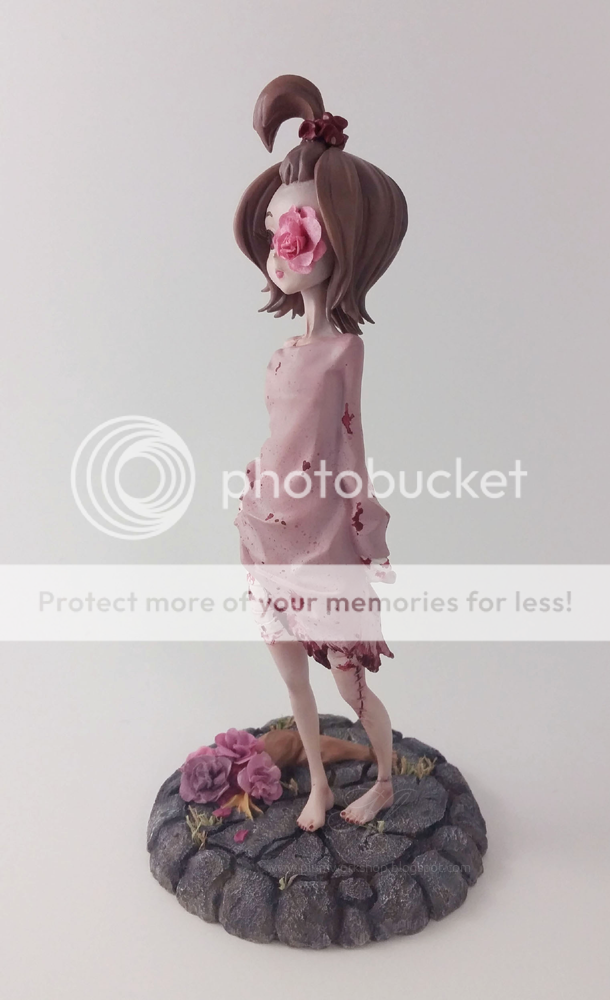
- Splattering - this is a little scary because you give away control of your model and hope that your splatters end up in a way that's aesthetically pleasing. I actually didn't intend to give her this effect in the beginning but I was painting her bandages and got carried away xD
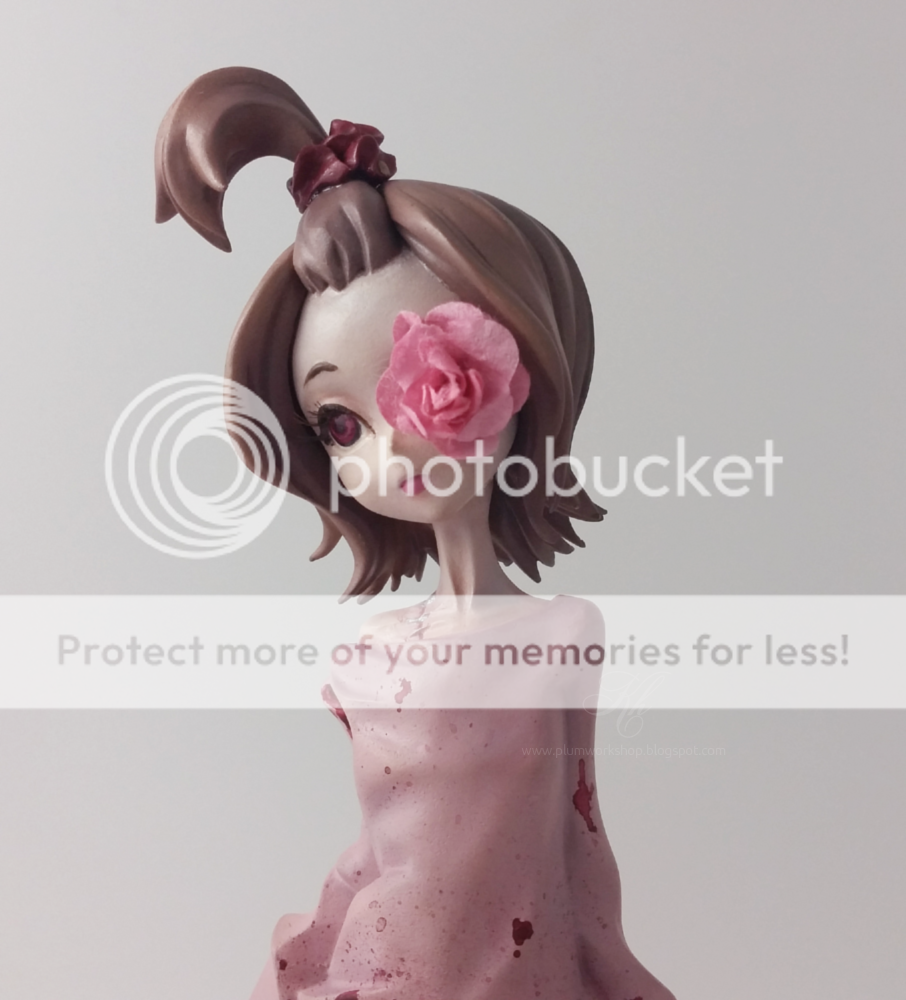
- Adding eyelashes - this took an embarrassingly long amount of time for me to be satisfied with the outcome. It was also an interesting experience going to the beauty store and finding that regular, high-quality fake lashes cost was more than I wanted to spend just to cut off a few cm for a fake eye (luckily I got some brown ones on sale). I used this guide which was very helpful.
- Adjustable parts - Although this technically isn't the first time I did this since my Suno kit has an alternative head I added some putty to her neck and essentially made it a ball joint so you can pose her head in any direction. This kit is too pretty to be facing in one direction forever.
- Making miniature flowers - I somehow always stop by the big box craft stores thinking they will have what I want but it never happens lol. This time I bit the bullet and decided to get over it and make them myself. I did a variation of this tutorial.
- Using a different sealer - I was very particular about how I wanted this figure to come out so I bought some Testors Dullcote sealer to achieve a very flat finish. Although it is not completely flat it came out much less shiny than Krylon matte sealer which is nice. I sprayed Future on beforehand with my airbrush to make sure she had a nice tough coat which also affected the flatness I think. In the future I might spray a mix of Future and Tamiya flat but I didn't have time to get it this time around.
- Making a lightbox - I was tired of only taking photos outside and some models like this one just aren't suited for that kind of atmosphere. I figured I needed some higher quality indoor shots so I made a custom light booth to photograph my models in.
So as you can see I really decided to test myself this time. And YES I finally got around to using my airbrush!!! It was surprisingly easier than I expected once I purchased the proper supplies - it turns out it wasn't the ratios or mixing colors or anything else that bothered me, it was not having the proper supplies to airbrush from the very beginning. I bought a few small sets of eye droppers with rubber stoppers and a set of medicine cups to mix paint in and that was all I needed to get going. I'm glad I have a background in hand-painting because there were a lot of places I needed to spot-fix or add detail to after airbrushing. Somehow I had the idea that it would be a cure-all but no, it's just another tool. It did speed up my painting time exponentially though so I can't wait to use it on larger models ^^
My Little Bride was airbrushed with Tamiya acrylics and the smaller details and base were hand-painted with craft acrylic paint. Everything was shaded either with an airbrush or pastel chalk and the kit was sealed with Future Floor Wax + some coats of Testors Dullcote to eliminate glossiness. I wanted to attain the feeling of freshly dead, a little creepy but still slightly romantic (what is this even) so I chose a color palette based on vintage roses. She stands in a league of her own next to my other kits and I'm pretty sure it's because of her skintone and the airbrushing. I'm thrilled with how she turned out but after this I need to paint a manly kit or at least something less pink LOL.
With that I hope that you enjoy my photos.
No comments:
Post a Comment